Hey friends, and welcome to scooks.com! Let’s talk about one of the most beautiful, chaotic, and downright exhausting times in a person’s life: those first few weeks with a new baby. You’re running on love, adrenaline, and probably very little sleep. The last thing on your mind? What’s for dinner. That’s where I come in!
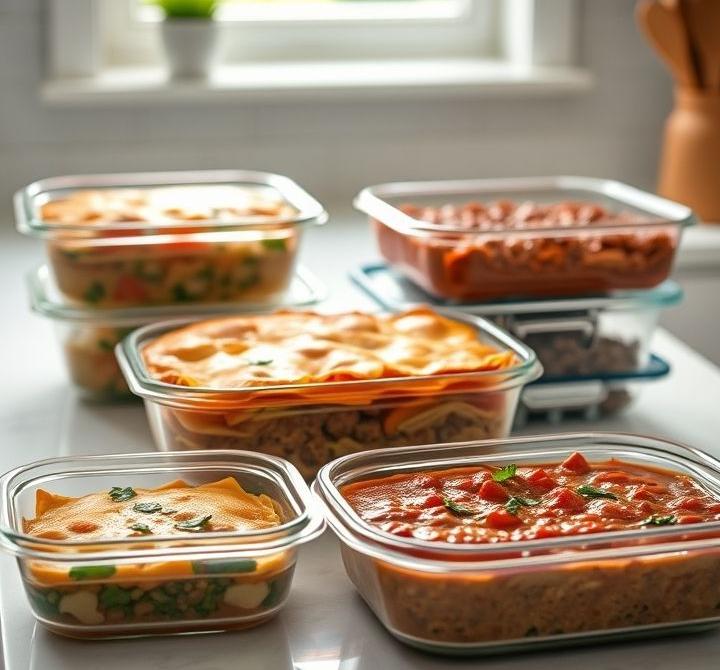
I am a huge believer in the power of a well-stocked freezer, especially for new parents. Having a stash of delicious, home-cooked meals ready to go feels like a superpower. Today, I’m sharing one of my all-time favorites, a recipe that’s become legendary among my friends and family. This Creamy Chicken and Wild Rice Bake is pure, unadulterated comfort. It’s warm, it’s hearty, and it’s one of the most satisfying easy freezer meals for new moms you will ever make. Seriously, it’s like a warm hug in a casserole dish. Let’s get cooking!
Why You’ll Love This Easy Freezer Meal
Ever find a recipe that just works on every level? This is it. It’s a staple in my home for so many reasons, and I know you’re going to fall in love with it, too.
Perfect for New Moms
This recipe was practically designed for the fourth trimester. It requires minimal effort to assemble, especially if you use a few smart shortcuts (which I’ll get to!). Knowing you have a wholesome, delicious dinner waiting in the freezer is a gift you give your future, tired self. It’s a cornerstone recipe for anyone building a collection of easy freezer meals for new moms.
Nutrient-Packed Comfort
We’re talking lean protein from the chicken, complex carbs and fiber from the wild rice, and a healthy dose of veggies. It’s the kind of soul-soothing comfort food that also happens to be packed with the good stuff you need to keep your energy up. You can feel genuinely good about eating this.
Truly a One-Dish Wonder
Protein? Check. Veggies? Check. Grains? Check. It’s a complete, balanced meal all in one convenient pan. No need to worry about making side dishes when you’re juggling a newborn. We love to see it!
Freezer-Friendly Champion
Some dishes just don’t freeze well, turning into a sad, watery mess upon reheating. Not this one! This casserole is a freezer champion. It holds its creamy texture beautifully, and that crunchy topping (which we pack separately!) tastes just as good as the day you made it.
Ingredients for Your Creamy Chicken and Wild Rice Bake
This ingredient list is all about simple, wholesome goodness. You probably have most of these things in your pantry already!
For the Casserole
- 4 cups Cooked Chicken, shredded or cubed: My secret weapon here is a store-bought rotisserie chicken. It saves so much time and the meat is always perfectly seasoned and moist!
- 3 cups Cooked Wild Rice Blend: I love using a blend that has long-grain brown rice, wild rice, and maybe some red rice for color and texture. Uncle Ben’s or Lundberg Farms make great ones!
- 1 can (10.5 ounces) Condensed Cream of Chicken Soup: For a from-scratch alternative, melt 3 tablespoons of butter in a saucepan, whisk in 3 tablespoons of flour, then slowly whisk in 1 ½ cups of warm chicken broth until smooth and thick. Season with salt and pepper!
- 1 cup Greek Yogurt or Sour Cream: This is the magic ingredient! It adds an incredible creaminess and a subtle tang that cuts through the richness. Full-fat versions work best for freezing.
- ½ cup Low-Sodium Chicken Broth: Just enough to get the perfect consistency.
- 2 cups Frozen Vegetable Mix (Peas, Carrots, Corn): No need to thaw! You can absolutely substitute with about 2 cups of fresh, sautéed veggies like diced celery, onions, and sliced mushrooms.
- Seasonings: 1 tsp garlic powder, 1 tsp onion powder, ½ tsp dried thyme, ½ tsp salt, and ¼ tsp black pepper.
For the Crunchy Topping
- ¾ cup Panko Breadcrumbs: These give you the best, lightest crunch. In a pinch, crushed Ritz crackers or even cornflakes work wonders.
- 3 tbsp Melted Butter: The key to a golden-brown, irresistible topping.
- ¼ cup Grated Parmesan Cheese (Optional): Optional, but is it really? The nutty, salty flavor takes this dish over the top!
Step-by-Step Instructions: From Prep to Freezer to Oven
Alright, let’s break this down into three simple phases. You’ve got this!
Phase 1: Assembling the Casserole
- Step 1: Mix the Creamy Base
In a large bowl, whisk together the cream of chicken soup, Greek yogurt (or sour cream), chicken broth, and all the seasonings (garlic powder, onion powder, thyme, salt, and pepper) until everything is smooth and well combined. - Step 2: Fold in Chicken, Rice, and Veggies
Gently fold the cooked chicken, cooked wild rice blend, and the frozen vegetable mix into the creamy base. Stir until every single piece is coated in that delicious sauce. Give it a taste and adjust seasoning if needed! - Step 3: Transfer to Your Freezer-Safe Pan
Spread the mixture evenly into a greased 9×13-inch freezer-safe baking dish. An aluminum foil pan is a fantastic option for easy cleanup and gifting!
Phase 2: Freezing for Later
- Step 4: Prepare and Pack the Topping Separately
In a small bowl, mix the panko breadcrumbs, melted butter, and optional Parmesan cheese until the crumbs are evenly moistened. Pack this mixture into a separate small zip-top freezer bag. This is the secret to a non-soggy topping! - Step 5: Wrap the Casserole for the Freezer
Let the casserole cool completely to room temperature. This is CRITICAL to prevent ice crystals from forming! Once cool, wrap the pan tightly with a layer of plastic wrap, followed by a layer of heavy-duty aluminum foil. - Step 6: Label, Label, Label!
Using a permanent marker, label the foil on the casserole and the baggie with the topping. Include the dish name (“Creamy Chicken & Rice Bake”), the date you made it, and the baking instructions. Future you will be so grateful!
Phase 3: Baking Your Delicious Freezer Meal
- Step 7: Baking From Frozen
Preheat your oven to 375°F. Remove the plastic wrap and foil from the casserole dish and replace the foil loosely on top. Bake for 60 minutes, then remove the foil and bake for another 20-30 minutes, or until it’s hot and bubbly throughout. - Step 8: Baking From Thawed
For a quicker bake time, you can thaw the casserole in the refrigerator overnight. Preheat the oven to 375°F. Bake, uncovered, for 30-40 minutes, or until heated through. - Step 9: Add the Topping and Bake Until Golden
During the last 15-20 minutes of baking (for both frozen or thawed methods), sprinkle the prepared panko topping evenly over the casserole. Continue baking until the topping is beautifully golden brown and crispy. - Step 10: Rest Before Serving
Let the casserole rest on the counter for about 5-10 minutes before serving. This helps it set up a bit and makes it easier to serve. Enjoy every single bite!
Pro Tips for the Perfect Freezer Casserole
A few of my tried-and-true tricks to guarantee this is one of the best easy freezer meals for new moms you’ll ever make.
The Rotisserie Chicken Shortcut
I mentioned it before, but it’s worth saying again! A rotisserie chicken is your best friend. It’s affordable, flavorful, and saves you the entire step of cooking and shredding chicken. Work smarter, not harder!
Cool Completely Before Freezing
I can’t stress this enough. Trapped steam creates condensation, which leads to ice crystals and a potentially watery casserole. Patience is key! Let it cool on the counter for at least an hour before you wrap it up.
Choose the Right Pan (Disposable vs. Glass)
Disposable aluminum foil pans are a new mom’s dream. There’s no dish to wash, and you don’t have to worry about getting your good bakeware back if you’re gifting a meal. If you use a glass or ceramic dish, just remember that extreme temperature changes can cause it to crack, so never put a frozen glass dish directly into a hot oven. Let it sit on the counter while the oven preheats.
Keep the Topping Separate for Maximum Crunch
Don’t be tempted to sprinkle the topping on before freezing! It will get soggy. Packing it separately in a little bag and taping it to the top of the frozen casserole is the foolproof way to ensure a perfectly crunchy finish every time.
Storage & Reheating Instructions
Freezing Instructions
When wrapped tightly, this casserole will keep beautifully in a deep freezer for up to 3 months. Perfect for making ahead of time!
Thawing Instructions
For best results, thaw the casserole in the refrigerator for 24 hours before you plan to bake it. This will result in a slightly creamier texture and a shorter cooking time.
Reheating Leftovers
Store any leftovers in an airtight container in the fridge for up to 4 days. You can reheat individual portions in the microwave for 1-2 minutes or until hot. The topping won’t be as crispy, but it’ll still be delicious!
Frequently Asked Questions (FAQ)
Can I make this gluten-free or dairy-free?
Absolutely! For gluten-free, use a gluten-free condensed soup (or make the homemade version with a GF all-purpose flour blend) and use gluten-free panko breadcrumbs. For dairy-free, use a dairy-free sour cream or yogurt alternative, dairy-free parmesan, oil or DF butter for the topping, and ensure your condensed soup is dairy-free.
Do I have to use a wild rice blend?
Nope! While the nutty flavor and chewy texture of a wild rice blend are fantastic here, you can definitely use cooked brown rice or even white rice. Just be mindful that white rice is softer and may not hold up quite as well after freezing and reheating, but it will still be tasty!
What other vegetables can I add?
Go for it! This casserole is super versatile. Sautéed mushrooms, onions, celery, or steamed broccoli florets would all be wonderful additions. Just be sure to cook any fresh veggies first to release some of their moisture before adding them to the casserole.
How do I prevent the casserole from becoming watery after freezing?
Three key things: 1) Use cooked rice, not instant. 2) Cook down any fresh, high-water-content vegetables (like mushrooms or zucchini) before adding them. 3) And the most important rule: Cool the casserole completely before wrapping and freezing it!
Can I assemble this in individual portions?
What a brilliant idea! This is one of the smartest things you can do when prepping easy freezer meals for new moms. Assemble the casserole in individual-sized freezer-safe containers or small foil loaf pans. Label them and reduce the baking time accordingly (start checking around the 25-minute mark for thawed or 45-minute mark for frozen).
A Warm Meal for a Special Time
There you have it—a recipe that’s more than just food. It’s peace of mind. It’s a warm, comforting meal waiting for you on a day when you need it most. Stocking your freezer with dishes like this is an incredible act of kindness to your future self.
I hope this Creamy Chicken and Wild Rice Bake brings as much comfort to your home as it has to mine. If you’re looking for more easy freezer meals for new moms, be sure to browse the rest of our collection here on scooks.com. Happy cooking, and congratulations on your new arrival!
You Might Also Like…
Looking for more ways to make meal prep a breeze? Check out these other helpful posts:
* 7 Best Mandoline Slicers with Safety Guards (2025 Reviews)

Rimi Sultana is a home cook from Bangladesh who has cooked for her family every day for the past five years and writes about it at Smart Cooks. Perpetually testing whether internet-famous recipes actually work in a regular home kitchen. Say hello on Facebook or through the contact page.