
Hey everyone, and welcome to scooks.com! Have you ever been so hot on a summer day that you wished for a drink that was more than just cold—a drink that was truly, deeply refreshing? Well, let me introduce you to my absolute favorite secret weapon against the heat: Tejuino.
If you’ve ever wandered the vibrant streets of Guadalajara, you’ve seen the carts, ladling out this magical, golden-brown beverage into cups rimmed with salt and lime. It’s a fermented corn drink that hits this incredible trifecta of sweet, salty, and tangy. It sounds a little wild, I know, but trust me, it’s the most satisfying thirst-quencher you’ll ever try. I was so smitten that I spent ages perfecting my own version, and I’m so excited to share this authentic, yet surprisingly simple, tejuino recipe with you. You’re going to love it!
Why You’ll Love This Tejuino Recipe
- Unbelievably Refreshing: Seriously, this is next-level refreshment. The combination of the fermented tang, sweet piloncillo, zesty lime, and a hint of salt is just what you need to beat the summer heat.
- A Taste of Authentic Mexico: This isn’t just a drink; it’s an experience. This tejuino recipe brings that traditional street cart vibe right into your kitchen. It’s the real deal!
- Gut-Friendly Probiotics: Who knew something this delicious could be good for you? The natural fermentation process creates beneficial probiotics, making it a happy treat for your tummy.
- Simple, Accessible Ingredients: Don’t be intimidated by the idea of fermenting! This is made with just a few pantry staples like masa harina (yep, the stuff for tortillas!) and piloncillo.
- Completely Customizable: You’re the boss here! Once the base is ready, you can adjust the lime, salt, and sweetness in each glass to create your perfect, personalized sip.
Ingredients
Here’s what you’ll need to get this delicious project started.
For the Tejuino Base:
- 1 cup Masa Harina (Note: It’s crucial to use masa harina, not cornmeal or polenta, for the right flavor and texture.)
- 1 (8-ounce) cone Piloncillo (or 1 cup packed dark brown sugar)
- 8 cups Water, divided
For Serving (per glass):
- 1-2 tablespoons Fresh Lime Juice (freshly squeezed is non-negotiable for that bright, zesty flavor!)
- Pinch of Sea Salt or Tajín
- Lots and lots of Ice
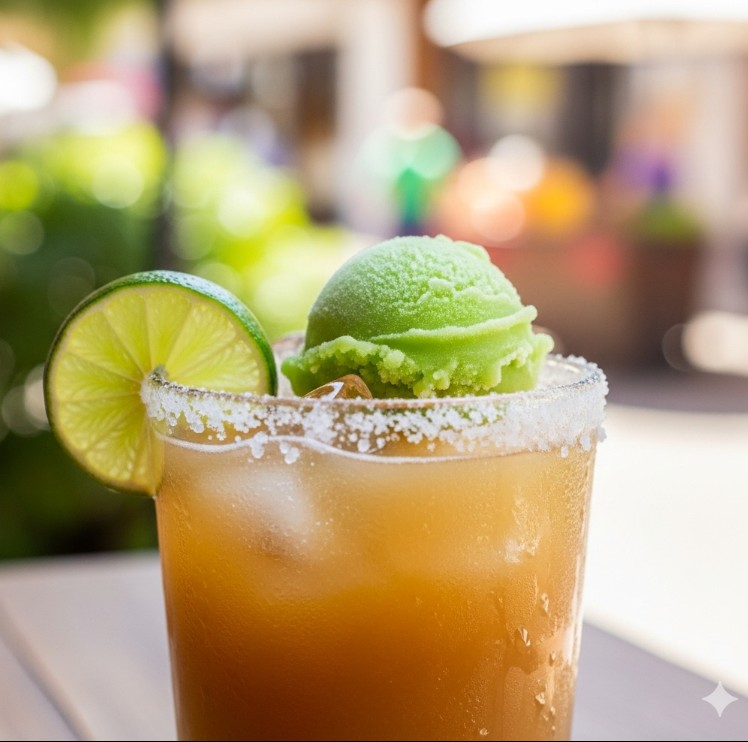
- Optional: Lime Sorbet (Nieve de Limón) – This is the traditional topping, and I highly recommend it. It melts into the drink and takes it from amazing to unforgettable.
Ingredient Notes & Substitutions
- Masa Harina: If you happen to live near a tortilleria and can get your hands on fresh masa (the unprepared dough), you can absolutely use it! You’ll probably need about 1 ½ cups. Just be prepared to adjust the water content a bit to get the right consistency.
- Piloncillo: These cones of unrefined cane sugar are usually found in the international aisle of larger grocery stores or at any Latin market. If you can’t find them, don’t sweat it! Dark brown sugar is the best substitute. Just use 1 cup, packed, to replace the 8-ounce cone.
Step-by-Step Instructions
Ready to make some magic? Let’s do this!
Part 1: Make the Atole (Corn Base)
- Create a Slurry: First things first, let’s avoid lumps! In a small bowl, whisk the masa harina with 2 cups of cool water until it’s completely smooth. It should look like thin pancake batter. This little step is my secret to a silky-smooth finish.
- Dissolve the Piloncillo: In a large pot or a Dutch oven, combine the remaining 6 cups of water and the piloncillo cone. Bring it to a simmer over medium heat, stirring occasionally until that beautiful piloncillo has completely dissolved into a fragrant, sweet liquid.
- Combine and Thicken: Now, while whisking constantly, slowly pour the masa slurry into the hot piloncillo water. Keep whisking! Continue to cook, stirring pretty frequently to prevent it from sticking to the bottom, until the mixture thickens up. You’re looking for the consistency of a thin gravy or loose pancake batter. This mixture is called an atole.
- Cool Completely: This is the most important step for great results! Remove the pot from the heat and let the atole cool all the way down to room temperature. You can speed this up by placing the pot in an ice bath, but don’t move on to the next step while it’s even a little bit warm.
Part 2: Ferment the Tejuino
- Transfer for Fermentation: Once it’s fully cooled, pour the atole into a large, clean glass jar, a ceramic crock, or a non-reactive pitcher.
- Cover and Wait: Cover the opening of your container with a few layers of cheesecloth or a clean kitchen towel and secure it with a rubber band or some string. This lets the good yeasts in the air do their work while keeping any dust or critters out.
- Ferment: Place the jar in a spot at room temperature, away from direct sunlight (a corner on your kitchen counter is perfect). Let it sit and ferment for 1 to 3 days. The timing really depends on how warm your kitchen is.
Part 3: Chill and Serve
- Check for Doneness: After about 24 hours, give it a look. You should see some little bubbles forming on the surface and smell a pleasantly sour, almost beer-like aroma. Give it a taste! When it has a light, tangy flavor that you enjoy, the fermentation is done. For a stronger flavor, let it go another day or two.
- Chill: Give the tejuino a good stir, then transfer it to the refrigerator to chill for at least 2 hours, or until it’s nice and cold.
- Assemble Your Drink: This is the fun part! To serve, fill a tall glass with ice. Pour the chilled tejuino until the glass is about three-quarters full. Add a generous squeeze of fresh lime juice (I like a lot!) and a pinch of salt or Tajín. Give it a good stir.
- Garnish and Enjoy: For the full, authentic experience, top it with a scoop of lime sorbet. It’s optional, but it’s a game-changer. Serve immediately and enjoy the most refreshing drink ever!
Pro Tips for Success
- No Lumps Allowed: I can’t say it enough: making that smooth slurry with cool water before adding the masa to the hot liquid is the absolute key to a perfectly smooth tejuino. Don’t skip it!
- Patience is a Virtue: Please, please make sure the atole base is completely cooled before you start the fermentation. Adding it while warm can encourage the wrong kind of bacteria to grow, leading to some funky, off-flavors.
- Use the Right Tools: Always ferment in glass, ceramic, or food-grade plastic. Metal containers can react with the acidity of the fermenting liquid and give your drink a weird metallic taste. No, thank you!
- Taste As You Go: The “perfect” level of fermentation is totally up to you. I like mine after about 2 days for a nice, balanced tang. Start tasting after 24 hours. If you love it, pop it in the fridge. Want it more sour? Let it keep going for another day.
Storage Instructions
Once your tejuino has fermented to your liking, move it to a sealed container like a lidded pitcher or a few mason jars and store it in the refrigerator. This will slow the fermentation process way, way down. It will keep beautifully in the fridge for up to 5 days. Just know that the flavor will continue to develop a little, getting slightly tangier over time. Separation is totally natural, so just give it a good stir before serving.
Frequently Asked Questions (FAQ)
What does tejuino taste like?
Oh, it’s so unique! Imagine an earthy, slightly thick drink from the corn, a deep sweetness from the piloncillo, and a bright, sour tang from the fermentation. When you serve it with fresh lime and a pinch of salt, it becomes this complex, savory, sweet, and sour beverage that is just unbelievably refreshing. It’s a flavor you won’t forget!
Is tejuino alcoholic?
Through the process of natural fermentation, tejuino does develop a very, very low alcohol content, usually somewhere between 0.5% and 2% ABV. It’s generally considered a refreshing, non-intoxicating beverage, kind of in the same category as kombucha.
My tejuino separated in the fridge. Did I do something wrong?
Nope, not at all! That’s perfectly normal. The corn solids will naturally settle at the bottom. It just means you made it right! Simply give it a vigorous stir or a good shake before you pour yourself a glass.
Can I make this faster?
While the hands-on time is short, the fermentation is a natural process that just needs time to work its magic. You can’t really rush it, but you can influence it! A warmer kitchen (say, 75-80°F) will lead to a faster fermentation, likely ready in 1-2 days. A cooler room might take a bit longer, maybe 2-4 days.
Time for a Refreshing Drink!
And there you have it! You’re now fully equipped to make one of Mexico’s most unique and beloved street-side drinks right in your own home. It’s such a fun project for a warm weekend and an even better reward on a hot afternoon. I really hope you fall in love with this taste of Jalisco just like I did. You must try our another recipe Natural Midwives Brew Recipe.
If you try this Tejuino recipe, please let me know how it went! Leave a comment and a rating below—I absolutely love hearing from you and seeing your kitchen adventures.
I am a passionate recipe developer and food enthusiast specializing in heart-warming traditional dishes and simple, everyday meals. My goal is to inspire you to find joy and confidence in the kitchen through my easy-to-follow recipes.