Hey there, fellow home bakers! Welcome to my little corner of the internet, scooks.com. I’m so excited to share what I truly believe is the last banana bread recipe you’ll ever need. Seriously. Are you tired of recipes with a million steps and a mountain of dishes? Me too. Say goodbye to all that fuss and hello to a perfectly moist, ridiculously flavorful, and incredibly simple loaf. This banana bread recipe easy enough for a total beginner, and it’s a one-bowl wonder that transforms those sad, overripe bananas on your counter into a warm, comforting hug in a loaf. Get ready, because your whole house is about to smell absolutely amazing!
Why You’ll Love This Recipe
- Incredibly Easy: It truly doesn’t get any easier than this. We’re talking one bowl, no fancy mixer needed—just a fork and a whisk! It’s the perfect recipe for a lazy Sunday morning.
- Perfectly Moist & Tender: Forget dry, crumbly banana bread. I’m sharing all my secrets to a super tender crumb that stays moist for days.
- Simple Pantry Ingredients: You’ve probably got everything you need for this banana bread recipe easy to make right now. No last-minute trips to the grocery store required!
- Crowd-Pleasing Flavor: It’s that classic, comforting taste we all crave. It’s perfectly sweet with a warm hint of cinnamon that feels like coming home.
- Versatile: Is it breakfast? An afternoon snack with coffee? A simple dessert? Yes, yes, and yes! It’s perfect for any occasion.
Ingredient List
Here’s what you’ll need to gather to make this fantastically simple banana bread. Don’t you just love a recipe with a short ingredient list?
Full measurements will be in the recipe card below.
Dry Ingredients
- All-Purpose Flour
- Baking Soda
- Salt
- Granulated Sugar
- Light Brown Sugar
- Ground Cinnamon (optional, but so good!)
Wet Ingredients
- Overripe Bananas
- Large Egg
- Unsalted Butter, melted
- Vanilla Extract
Notes on Ingredients & Substitutions
- Bananas: The browner, the better! I mean it. Those bananas that are almost black and squishy? They’re pure gold for banana bread. They’re sweeter, easier to mash, and pack way more moisture. You’ll want about 1 ½ cups mashed, which is usually 3 to 4 medium-sized bananas.
- Butter: Melted butter gives this bread a wonderfully rich, decadent flavor. If you’re in a pinch, you can substitute it with an equal amount of a neutral oil like canola or vegetable oil, or even melted coconut oil for a slightly different vibe.
- Sugar: I love using a combination of light brown and granulated sugar. The brown sugar adds moisture and a slight caramel note, while the white sugar helps create that perfect texture. But hey, if you only have one kind, it’ll still be delicious.
- Flour: For a gluten-free version that still tastes amazing, just swap the all-purpose flour with a good 1-to-1 gluten-free baking flour blend.
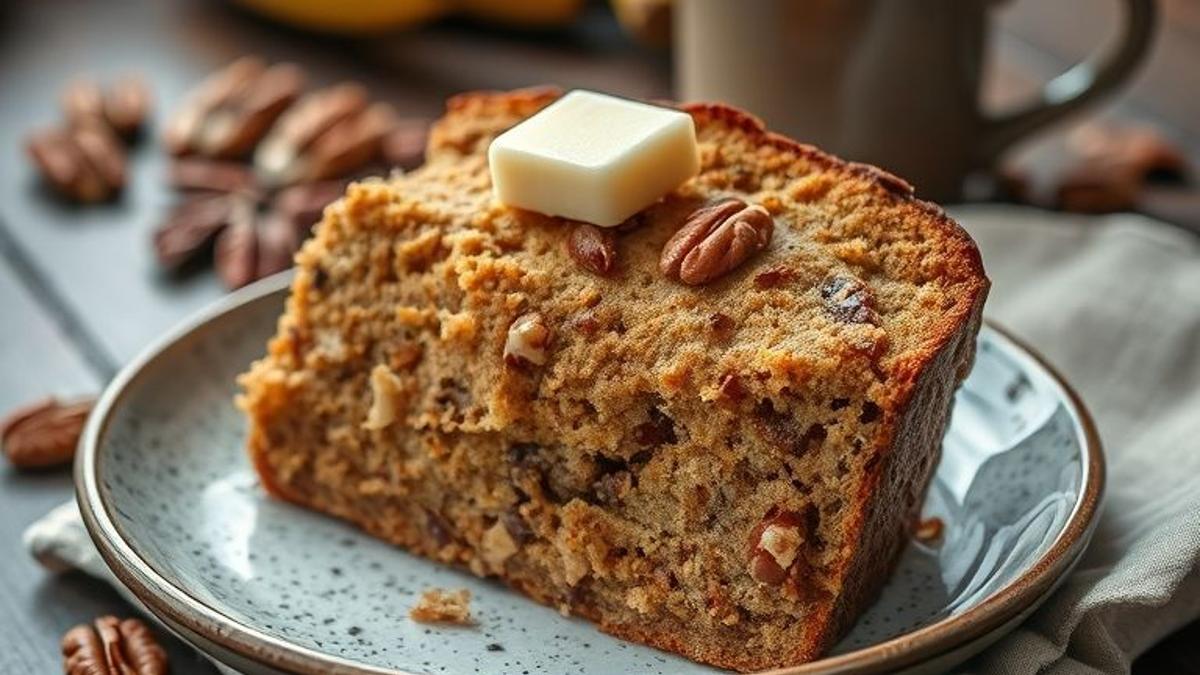
- Mix-ins (Optional): This is where you can get creative! Feel free to fold in about ¾ cup of semi-sweet chocolate chips, chopped walnuts, or pecans into the batter right before you pour it into the pan. You can’t go wrong!
Step-by-Step Instructions
Making this banana bread recipe easy is all about the simple, straightforward steps. Let’s do this!
- Prep: First things first, get your oven preheating to 350°F (175°C). Go ahead and grease and flour a 9×5-inch loaf pan so it’s ready for that beautiful batter.
- Mash the Bananas: In a large bowl, go to town mashing those overripe bananas with a fork. You want them mostly smooth, but a few little lumps are totally fine—they add great texture!
- Combine Wet Ingredients: Right into that same bowl with the bananas, add your melted butter, the whisked egg, both sugars, and the vanilla extract. Give it all a good stir until it’s well combined.
- Add Dry Ingredients: Now, just sprinkle the flour, baking soda, salt, and cinnamon (if you’re using it) directly on top of the wet ingredients. See? I told you it was a one-bowl recipe!
- Mix Gently: Grab a spatula and gently fold the dry ingredients into the wet. The key here is to mix just until you don’t see any more dry streaks of flour. Please, be careful not to overmix! A lumpy batter is a happy batter.
- Pour and Bake: Pour that glorious batter into your prepared loaf pan and use your spatula to spread it out evenly. Pop it into the oven and bake for 55-65 minutes. You’ll know it’s done when a toothpick inserted into the center comes out clean or with just a few moist crumbs clinging to it.
- Cool: Patience is a virtue! Let the banana bread cool in the pan for about 10 minutes. Then, carefully turn it out onto a wire rack to cool completely before slicing. (Okay, who are we kidding? A warm slice is heavenly, but it slices much better when cool!)
Baker’s Tips for Success
Want to make sure this banana bread recipe easy and foolproof every single time? Here are my top tips.
– Use VERY Ripe Bananas: I can’t stress this enough. For the absolute best flavor, your bananas should be covered in brown spots or almost completely brown. Pro Tip: Need to ripen bananas in a hurry? Place them on a baking sheet and bake them at 300°F for 15-20 minutes until the peels turn black. Magic!
– Measure Flour Correctly: This is a game-changer! Instead of scooping flour directly from the bag with your measuring cup, use a spoon to fluff it up and then spoon it into the cup. Level it off with the back of a knife. This prevents you from packing in too much flour, which is the #1 cause of dry baked goods.
– Do Not Overmix: I’m saying it again because it’s that important! Overmixing develops the gluten in the flour, which leads to a tough, dense, and gummy loaf. We want tender and fluffy, so mix only until the flour just disappears.
– Tent with Foil: Is the top of your loaf getting a little too dark before the inside is cooked through? No problem. Just loosely tent a piece of aluminum foil over the top of the pan for the last 15-20 minutes of baking.
Storage Instructions
Room Temperature
Your best bet for maintaining that perfect texture is to store the completely cooled banana bread in an airtight container or wrap it tightly in plastic wrap. It’ll stay fresh and delicious at room temperature for up to 3 days.
Refrigerator
If you want to extend its life a bit, you can store it in an airtight container in the fridge for up to a week. Just a heads up, refrigeration can sometimes make it a bit denser, but it’s still yummy!
Freezing
Oh yeah, this banana bread freezes like a dream! It’s perfect for stashing away for a rainy day.
– Whole Loaf: Wrap the cooled loaf super tightly in two layers of plastic wrap, then a final layer of aluminum foil. It’ll keep in the freezer for up to 3 months.
– Individual Slices: This is my favorite trick! Slice the bread, wrap each slice individually in plastic wrap, and then pop them all into a freezer-safe bag. It’s the ultimate grab-and-go snack! Just thaw a slice at room temp or give it a quick zap in the microwave.
Frequently Asked Questions (FAQ)
- Can I use frozen bananas?
Yes, absolutely! Just let the frozen bananas thaw completely at room temperature. They’ll release a bit of liquid—be sure to drain that extra liquid off before you mash them up for the recipe. - Why is my banana bread dense or gummy?
This is almost always due to one of two things: overmixing the batter or underbaking the loaf. Remember to mix only until the ingredients are just combined, and always, always do the toothpick test to make sure it’s cooked through in the center. - Can I make this recipe into muffins?
Of course! It’s so easy to adapt. To make this banana bread recipe easy for muffins, just divide the batter into a greased or lined 12-cup muffin tin, filling each cup about ¾ full. Bake at 350°F for about 18-22 minutes, or until a toothpick comes out clean. - Can I reduce the amount of sugar?
You can, but I recommend doing so with caution. Sugar does more than just add sweetness; it’s crucial for creating a moist and tender texture. Reducing it too much might result in a drier, less flavorful loaf.
Conclusion
And there you have it—a simple, no-fail, and truly delicious banana bread recipe easy enough for any day of the week. It’s the ultimate comfort bake and the absolute best way to give those ripe bananas a new purpose in life. We really hope you love making (and eating!) it as much as we do here at scooks.com! If you give this recipe a try, I’d be so grateful if you’d leave a comment and a rating below to let me know how it turned out. Happy baking, everyone!
I am a passionate recipe developer and food enthusiast specializing in heart-warming traditional dishes and simple, everyday meals. My goal is to inspire you to find joy and confidence in the kitchen through my easy-to-follow recipes.