Hey there, fellow food lovers! Are you ready to dive into something truly magical this morning (or afternoon, or evening – I won’t judge!)? Today, we’re talking about a showstopper that’s deceptively simple: the Dutch Baby recipe. If you’ve never made one before, prepare to be amazed. And if you have, get ready for the best version you’ll find!
Why You’ll Love This Dutch Baby Recipe
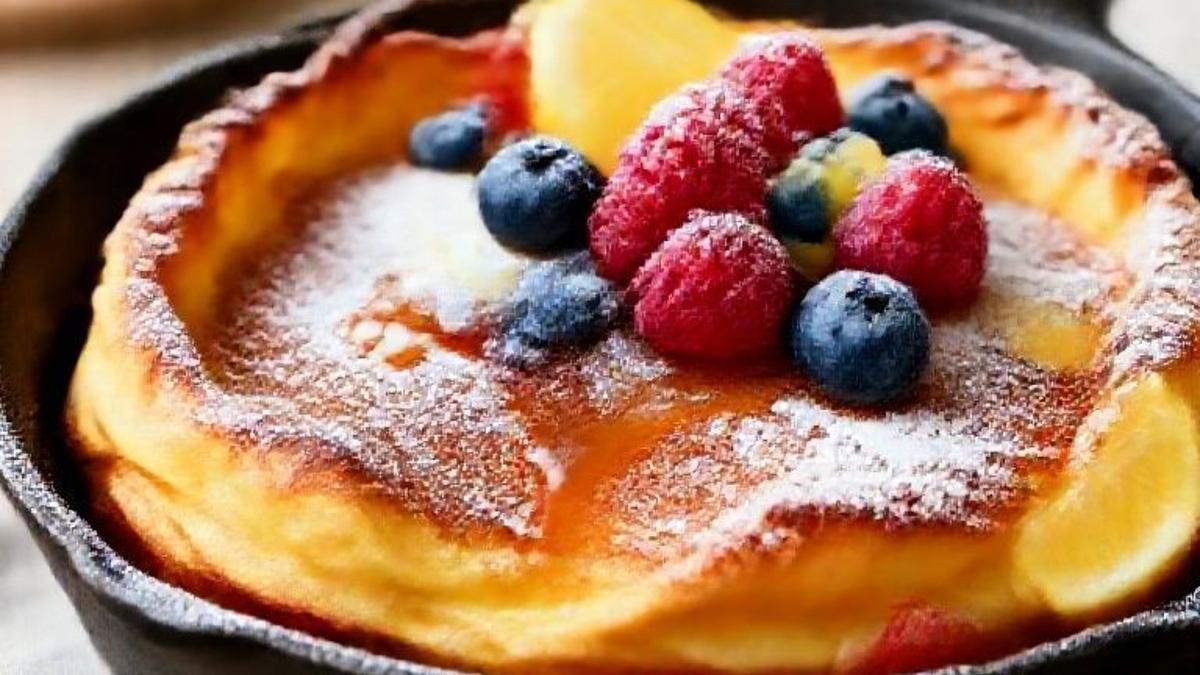
Oh, where do I even begin? This isn’t just a pancake; it’s an experience! Imagine a giant, fluffy, golden-brown pancake that puffs up dramatically in the oven, creating these gorgeous, crispy edges and a tender, custardy center. It’s truly a sight to behold, and honestly, it makes you look like a culinary genius with minimal effort. What’s not to love about that? This particular Dutch Baby recipe is my go-to because it’s foolproof, uses simple pantry staples, and comes together in a flash. It’s perfect for a lazy weekend brunch, a special breakfast, or even a fun, light dessert. Plus, it’s incredibly versatile – sweet or savory, you choose! You’ll absolutely adore the way it fills your kitchen with the most inviting aroma, and how quickly it becomes a family favorite.
Detailed Ingredient List
Gathering your ingredients is the first step to a perfect Dutch Baby recipe. Make sure everything is ready to go!
Wet Ingredients
- 2 large Eggs, at room temperature. Trust me, this makes a difference in the puff! If you forget to take them out, just pop them in a bowl of warm water for a few minutes.
- ½ cup Milk. Whole milk really gives the best richness and flavor, but honestly, others work too. I’ve used 2% with great results.
- Substitution Note: Dairy-free milk like almond or oat milk can absolutely be used! Just ensure it’s unsweetened if you’re going for a traditional flavor.
- 1 teaspoon Pure Vanilla Extract. This adds such a lovely warmth to the batter. Don’t skimp on the good stuff if you can help it!
- Substitution Note: A ¼ teaspoon of almond extract can offer a unique twist, or you can omit it entirely if you prefer.
Dry Ingredients
- ½ cup All-Purpose Flour, unbleached if possible. This is the backbone of our pancake!
- Substitution Note: For our gluten-free friends, a good quality gluten-free all-purpose flour blend can be substituted. Just double-check that it contains xanthan gum for structure.
- 1 tablespoon Granulated Sugar. This gives it a touch of sweetness and helps with browning.
- Substitution Note: Feel free to use a touch less or more to taste. For a different kind of sweetness, you could try a tablespoon of maple syrup directly in the batter instead of granulated sugar.
- ¼ teaspoon Fine Sea Salt. Essential for balancing the flavors and bringing out the sweetness.
For Cooking
- 2 tablespoons Unsalted Butter, cold and cut into a few pieces. This will melt beautifully in our hot pan.
- Substitution Note: While butter offers superior flavor and helps achieve those crispy edges, coconut oil or another high-heat oil can be used in a pinch.
Optional Toppings & Serving Suggestions
This is where the fun really begins! What will you adorn your beautiful Dutch Baby recipe creation with?
* Powdered Sugar: A classic, delicate dusting that just looks so elegant.
* Fresh Berries: Strawberries, blueberries, raspberries – a colorful burst of freshness and natural sweetness.
* Maple Syrup or Honey: A drizzle of pure maple syrup or golden honey is always a winner.
* Lemon Wedges: A squeeze of fresh lemon juice cuts through the richness and brightens every bite.
* Whipped Cream or Crème Fraîche: For an extra touch of indulgence.
* Savory Topping Ideas: Don’t limit yourself! Think grated cheese and herbs, sautéed mushrooms, caramelized onions, or even a fried egg on top for a truly unique brunch experience.
Step-by-Step Instructions
Ready to get cooking? This Dutch Baby recipe comes together so quickly, you’ll wonder why you haven’t made it every weekend!
1. Preheat Oven & Pan
First things first: Preheat your oven to a blazing 425°F. While it’s heating, place a 10-inch cast iron skillet (or another oven-safe, heavy-bottomed pan) directly into the oven. We want that pan screaming hot. Let it preheat for at least 10-15 minutes while you prepare the batter.
2. Prepare the Batter
In a blender (my preferred method for ultimate smoothness!) or a large bowl, combine the room temperature eggs, milk, vanilla extract, all-purpose flour, granulated sugar, and salt. Blend on high until the batter is completely smooth and lump-free. If you’re whisking by hand, really go for it until there are no dry spots. You can also use a hand mixer. Don’t overmix, just combine until smooth.
3. Melt the Butter
Carefully remove the super hot skillet from the oven using oven mitts. Add the cold butter pieces to the hot pan. The butter will melt almost instantly and start to sizzle. Swirl the pan to coat the bottom and sides evenly with the melted butter.
4. Pour & Bake
Immediately pour the smooth batter into the buttered, hot skillet. Gently place the skillet back into the preheated oven. Bake for 15-20 minutes, or until the Dutch Baby is dramatically puffed, deeply golden brown around the edges, and set in the center. Seriously, resist the urge to open the oven door during this time – let it do its magic!
5. Serve Immediately
As soon as it comes out of the oven, your beautiful Dutch Baby will begin to deflate slightly, which is totally normal! Dust it generously with powdered sugar, add your favorite toppings, and serve it right away. It’s best enjoyed hot and fresh from the oven.
Baker’s Tips / Pro Tips for Success
Want to nail this Dutch Baby recipe every single time? Here are my secret weapons:
The Hot Pan is Key
I can’t stress this enough! A screaming hot pan is what makes the Dutch Baby puff up so dramatically. It creates that instant steam and lift. Don’t rush this step; let your pan preheat for a good 10-15 minutes.
Room Temperature Ingredients
Using room temperature eggs and milk helps the batter combine more smoothly and contributes to a better rise. Cold ingredients can shock the batter and hinder its ability to puff up to its full potential.
Don’t Peek!
Seriously, as tempting as it is to peek at your masterpiece, resist! Opening the oven door releases heat, which can cause your Dutch Baby to collapse before it’s fully set. Trust the process and that high heat.
Achieve a Smooth Batter
Lumps in your batter can prevent an even rise and a smooth texture. A blender is your best friend here, but vigorous whisking will also do the trick. Just make sure it’s silky smooth before it hits the pan.
Embrace the Collapse
It’s going to deflate! That’s just what a Dutch Baby does. Don’t be disappointed; it’s part of its charm. The collapse creates those beautiful, tender valleys perfect for holding all your delicious toppings.
Topping Your Masterpiece
Have your toppings ready before your Dutch Baby comes out of the oven. Speed is key to serving it at its absolute best. Think about what flavors you love – sweet, tart, rich, savory – and go wild!
Storage Instructions
While a Dutch Baby is definitely best enjoyed fresh, sometimes you might have a little leftover. (It’s rare, I know!)
Leftovers
Allow any leftover Dutch Baby to cool completely. Store it in an airtight container in the refrigerator for up to 2-3 days. It won’t have the same dramatic puff, but it’s still delicious!
Reheating
To reheat, you can gently warm slices in a toaster oven or in a skillet on the stovetop over medium-low heat until warmed through. The microwave works in a pinch, but it won’t regain any crispiness.
Frequently Asked Questions (FAQ)
Got questions about this amazing Dutch Baby recipe? I’ve got answers!
Why didn’t my Dutch Baby puff up?
This is usually due to a few common culprits! The most likely reasons are: your oven wasn’t hot enough, your pan wasn’t preheated sufficiently, your ingredients (especially eggs and milk) were too cold, or you opened the oven door too early, letting out all that crucial heat.
Can I make the batter ahead of time?
Yes, you can! You can prepare the batter and store it in an airtight container in the refrigerator for up to 12-24 hours. Just give it a good whisk or blend again right before you’re ready to bake your Dutch Baby to ensure everything is well combined.
What kind of pan should I use?
A 10-inch cast iron skillet is ideal for this Dutch Baby recipe because it retains heat so well, which is crucial for that signature puff. If you don’t have one, any heavy, oven-safe skillet will work, just make sure it can withstand high heat.
Can I make a savory Dutch Baby?
Absolutely! Omit the granulated sugar from the batter. After it bakes, you can top your savory Dutch Baby with things like sautéed mushrooms and spinach, crumbled feta and fresh herbs, crispy bacon and a fried egg, or even roasted vegetables. Get creative!
Is a Dutch Baby actually Dutch?
Despite its name, the Dutch Baby pancake is actually American in origin, developed in a Seattle restaurant in the early 20th century. It’s thought to be a variation of the German Pfannkuchen, which is why it’s sometimes referred to as a German pancake. So, while it sounds Dutch, its roots are more German-American!
Happy Baking!
There you have it, folks – my absolute favorite Dutch Baby recipe! I truly hope you give this a try and fall in love with its simplicity and impressiveness as much as I have. There’s nothing quite like pulling this golden beauty out of the oven and watching it puff up. So, what are you waiting for? Grab those ingredients, heat up that pan, and get ready to enjoy a truly delightful treat. Happy baking, and don’t forget to share your creations with me!
I am a passionate recipe developer and food enthusiast specializing in heart-warming traditional dishes and simple, everyday meals. My goal is to inspire you to find joy and confidence in the kitchen through my easy-to-follow recipes.