Hey there, fellow bakers! It’s your friend from scooks.com, and today we’re diving into one of my absolute favorite kitchen projects: cookie decorating! What’s the secret to those stunning, flawlessly decorated sugar cookies or that gingerbread house that holds together like a dream? It all comes down to one thing: a truly fantastic royal icing recipe.
I know, I know. Royal icing can sound a little intimidating. You’ve probably seen those mesmerizing videos of bakers flooding cookies with perfect precision and thought, “I could never do that!” But I’m here to tell you that you absolutely can. This is the royal icing recipe I swear by. It’s completely foolproof, ridiculously reliable, and perfect whether you’re decorating your first-ever batch of holiday cookies or you’re a seasoned pro. Ready to create some edible art? Let’s get to it!
Why You’ll Love This Royal Icing Recipe
Honestly, there are so many reasons to adore this recipe, but here are the highlights that make it my one and only.
- Perfectly Smooth Finish: This icing dries to a hard, beautiful, matte finish that looks so professional. It’s the secret to cookies that are almost too pretty to eat. Almost!
- Delicious Flavor: Let’s be real, some royal icing can taste a bit… chalky. Not this one! A little hint of vanilla makes it taste just as good as it looks, which is a total game-changer.
- Incredibly Stable & Safe: We’re using meringue powder, which means no raw egg whites! It’s completely food-safe, super stable, and whips up beautifully every single time. Peace of mind is the best ingredient.
- Fully Customizable: This is your blank canvas! You can easily tint it with any color under the sun and adjust the consistency for everything from fine-line details to perfectly smooth flooding.
- Simple & Reliable: You only need a few pantry-staple ingredients and a stand mixer to get professional-quality results. The mixer does all the hard work, so you can focus on the fun part—decorating!
Royal Icing Ingredients
You’ll be amazed at how few ingredients it takes to make the perfect icing.
- 4 cups confectioners’ sugar (powdered sugar), sifted
- 3 tablespoons meringue powder
- 9-12 tablespoons warm water
- 1 teaspoon clear vanilla extract
- 1 teaspoon light corn syrup (Optional, for sheen and a softer bite)
- Pinch of salt
Ingredient Notes & Substitutions
- Meringue Powder: What is this magical stuff? It’s essentially pasteurized, dried egg whites. It’s the gold standard for this royal icing recipe because it’s safe, creates a super stable icing, and gives it that classic hard finish. You can usually find it in the baking aisle of most grocery stores, at craft stores like Michael’s or Jo-Ann, or easily online.
- Confectioners’ Sugar: I’m going to say this three times: sift, sift, sift! Sifting your powdered sugar is the most important step to prevent tiny lumps from clogging your piping tip later. Trust me on this one; it’ll save you so much frustration!
- Clear Vanilla Extract: Ever wonder how bakers get that pure, bright white icing? This is the secret! Regular vanilla extract has a brownish tint that can make your icing look dingy. Using a clear extract keeps your base a perfect white, which is ideal for coloring. You can also experiment with other clear extracts like almond or lemon for different flavor profiles!
- Light Corn Syrup: This is my little secret ingredient! While it’s optional, I almost always add it. It gives the dried icing a very subtle sheen and, more importantly, a softer bite. It prevents the icing from being rock-hard and brittle, making the cookies much more enjoyable to eat.
How to Make Royal Icing: Step-by-Step
Alright, let’s whip up a batch! It’s easier than you think.
Step 1: Sift the Dry Ingredients
First things first! In the bowl of your stand mixer (fitted with the whisk attachment), sift together the confectioners’ sugar and the meringue powder. This step is non-negotiable for a perfectly smooth icing.
Step 2: Add Water and Flavorings
Pour in 9 tablespoons of the warm water, the clear vanilla extract, the pinch of salt, and the optional light corn syrup. Don’t add all the water at once; you can always add more later if you need it.
Step 3: Mix to Perfection
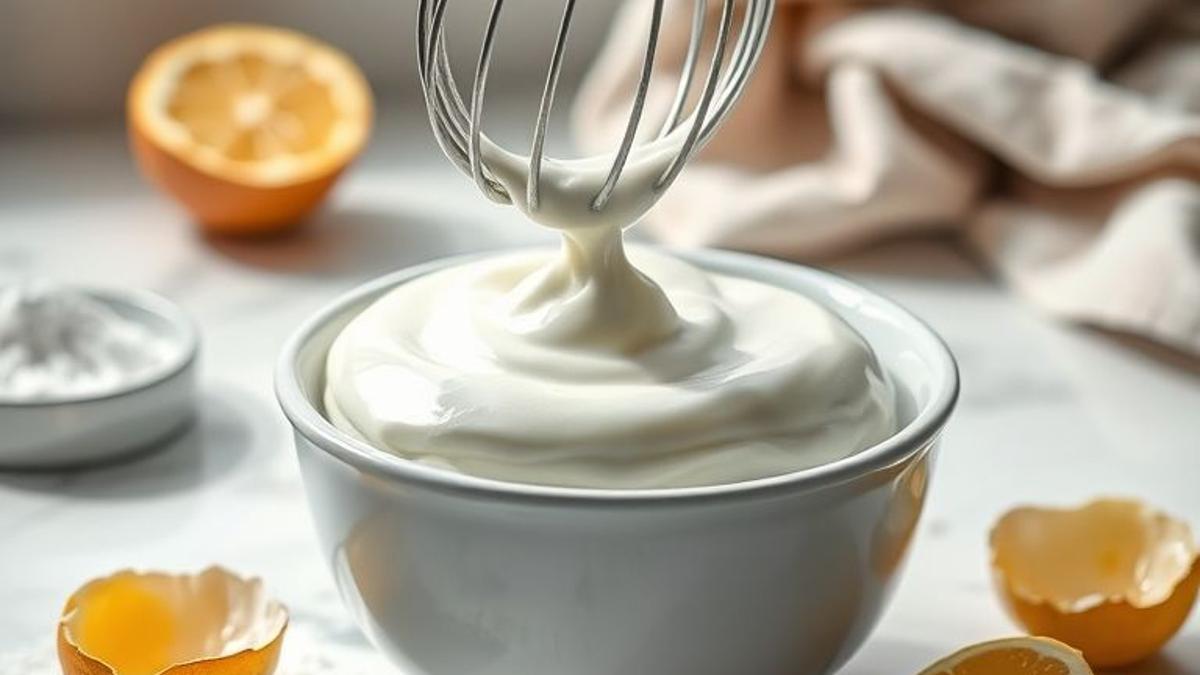
Turn your mixer on low speed just to get everything combined and avoid a powdered sugar explosion in your kitchen. Once it’s mixed, crank the speed up to medium-high and let it whip for about 5-7 minutes. You’re looking for icing that is bright white, super glossy, and forms stiff peaks that hold their shape. It’ll look a lot like a thick marshmallow fluff!
Step 4: Achieve Your Desired Consistency
Right out of the mixer, your icing is at its stiffest consistency, which is perfect for piping details or gingerbread house construction. For decorating cookies, you’ll likely want to thin it out.
- Piping/Outlining Consistency: This is the stiff icing straight from the mixer. It’s perfect for piping borders on your cookies that will act as a dam to hold in the thinner icing.
- Flood Consistency: To get that gorgeous, smooth surface, you’ll need to thin the icing. Transfer some of your stiff icing to a separate bowl. Add warm water, just a teaspoon at a time, and stir gently with a spatula. The key is the “10-second rule.” When you drizzle a line of icing across the surface, the line should disappear back into the icing in about 10 seconds. If it’s faster, it’s too thin. If it’s slower, it’s too thick. Just add water or a bit more stiff icing to adjust!
Step 5: Color Your Icing
Now for the fun part! Divide your icing into separate bowls for each color you want to make. I highly recommend using gel food coloring. Liquid food coloring can thin out your icing too much, but a tiny drop of gel provides vibrant color without changing the consistency. A little goes a long way!
Baker’s Tips for Success
Follow these simple rules, and you’ll nail this royal icing recipe every time.
- Always Cover Your Icing: Royal icing begins to crust over the second it hits the air. Always keep your bowls of icing covered with a damp paper towel or plastic wrap pressed directly against the surface of the icing to prevent a crust from forming.
- Grease is the Enemy: Any little bit of grease or fat—from your hands, in the bowl, on a spatula—can ruin your icing and prevent it from whipping up properly. Make sure your mixer bowl and all utensils are squeaky clean before you start!
- Start Stiff: It is always, always easier to thin icing by adding water than it is to thicken it back up. That’s why we mix it to a stiff consistency first and then thin it down as needed for our projects.
- Let it Dry Completely: Patience is a virtue in cookie decorating! You need to let your cookies air dry, uncovered, for at least 8-12 hours (or simply overnight) until the icing is completely hard. Don’t try to stack or package them before then, or you’ll have a smudgy mess.
Storage Instructions
Got leftovers? No problem! This icing stores beautifully.
Storing at Room Temperature
Place your leftover icing in an airtight container. Press a piece of plastic wrap directly onto the surface of the icing to prevent a crust from forming, then seal the lid. It will keep at room temperature for up to one week. The icing will separate as it sits, so you’ll need to give it a good stir or re-whip it in your mixer for a minute before using.
Freezing Royal Icing
Yes, you can freeze it! Store it in an airtight, freezer-safe container or a freezer bag for up to 3 months. To use, let it thaw completely in the refrigerator or on the counter. Once thawed, transfer it to your mixer bowl and re-whip it for a few minutes to bring it back to its original fluffy texture.
Frequently Asked Questions (FAQ)
I get a lot of questions about this royal icing recipe, so here are some of the most common ones.
Can I use fresh egg whites instead of meringue powder?
You can, but I strongly recommend using meringue powder for food safety reasons, as it’s pasteurized. If you choose to use fresh egg whites, you’ll want to use about 2 large egg whites in place of the meringue powder and water. Just be mindful of the risks associated with consuming raw eggs.
Why is my royal icing so brittle?
If your icing is drying super hard and brittle, it’s likely because it was slightly over-whipped or just needs a little something to soften it. This is where that optional teaspoon of light corn syrup really works its magic! It gives the finished icing a much softer, more pleasant bite.
How do I fix icing that is too thin?
It happens to all of us! If you accidentally add too much water, don’t panic. Just add more sifted confectioners’ sugar, a tablespoon at a time, and mix until you’re back to the consistency you need.
How long does royal icing take to dry completely?
This depends on a few factors, like the consistency of your icing (thinner flood icing takes longer), the humidity in your home, and the airflow in the room. Generally, you should plan for at least 8-12 hours, but it can sometimes take up to 24 hours for it to be 100% hard all the way through.
Happy Decorating!
And there you have it—the only royal icing recipe you’ll ever need to create cookies that will wow your friends and family. The most important thing is to have fun with it! Put on some music, let your creativity flow, and don’t worry about perfection.
I can’t wait to see what you create! If you try this recipe, please leave a comment and a rating below. Happy decorating!
I am a passionate recipe developer and food enthusiast specializing in heart-warming traditional dishes and simple, everyday meals. My goal is to inspire you to find joy and confidence in the kitchen through my easy-to-follow recipes.