
Hey there, fellow food lovers! It’s your friend from scooks.com, and today, we’re diving into one of my all-time favorite kitchen projects. Tired of bland, salty, store-bought cartons? This is the chicken stock recipe that will change your cooking forever. We’re not just simmering bones; we’re roasting them first to build an incredibly deep, rich, golden-brown stock that chefs call “liquid gold.” This one simple, hands-off technique is the secret to unlocking a new level of flavor in all your favorite soups, sauces, and stews. Get ready to elevate your entire kitchen game.
Why You’ll Love This Recipe
Honestly, once you make your own stock, you’ll wonder how you ever lived without it. It’s a true game-changer. Here’s why I know you’ll fall in love with this particular chicken stock recipe:
- Unbelievably Rich Flavor: Roasting the bones creates a deep, complex flavor that is worlds away from anything you can buy at the store. It’s savory, complex, and just… better.
- The Ultimate Kitchen Staple: This is my secret weapon for better soups, richer pan sauces, heartier gravies, and more flavorful grains like risotto or quinoa.
- No-Waste Cooking: It’s the perfect way to use up a leftover roasted chicken carcass and vegetable scraps you might otherwise throw away. I love that we’re giving those ingredients a second, glorious life!
- Mostly Hands-Off: After a few minutes of prep, the stock simmers gently on the stove, making your whole house smell absolutely amazing without much effort. Seriously, it’s the best kind of kitchen potpourri.
- Freezer-Friendly: Make one big batch and freeze it in convenient portions. You’ll have homemade liquid gold ready to go for months!
Ingredient List for the Perfect Chicken Stock Recipe
This list is your foundation for flavor. Don’t be afraid to use what you have, but this combination is a classic for a reason!
For the Stock:
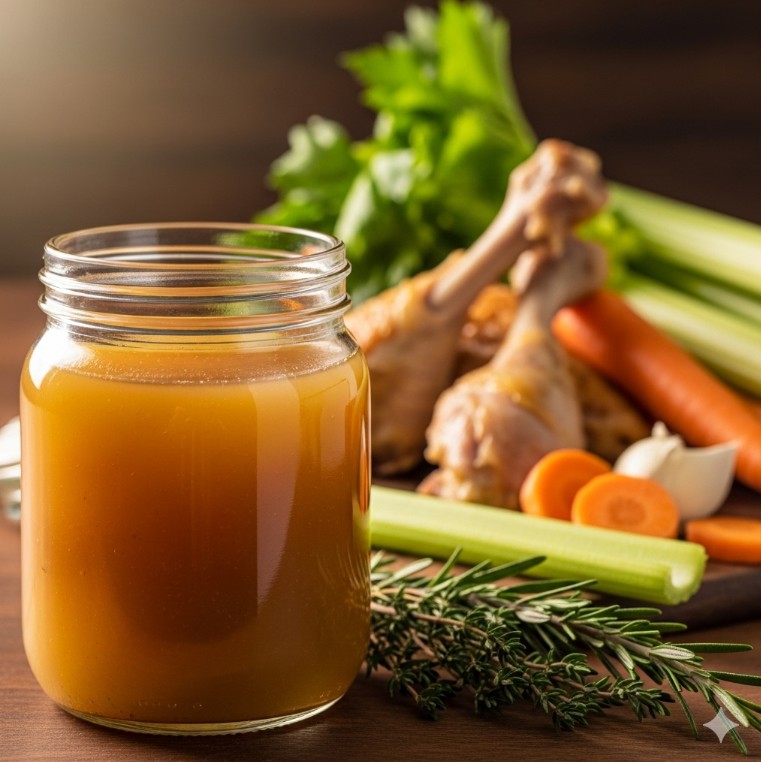
- 4-5 lbs chicken parts: A mix of bony parts like backs, necks, and wings is ideal. You can also use one or two leftover roasted chicken carcasses.
- 2 large yellow onions: No need to peel, just quartered. The skins add beautiful color.
- 3 medium carrots: Washed and roughly chopped. No need to peel.
- 3 celery stalks: Washed and roughly chopped, leaves and all.
- 1 head of garlic: Sliced in half crosswise.
- 1 bunch fresh parsley (stems mostly): Adds a fresh, clean flavor.
- 6-8 sprigs fresh thyme:
- 2 bay leaves:
- 1 tbsp whole black peppercorns:
- 16 cups (1 gallon) cold water: Or enough to cover the ingredients by about 2 inches. Using cold water is key for a clear stock.
- Optional: 1-2 chicken feet for extra collagen and a richer, more gelatinous stock.
Notes on Ingredients & Substitutions:
- Chicken: I always ask my local butcher for chicken backs and necks—they are super inexpensive and perfect for stock. I find that a mix of raw bones and a leftover roasted carcass yields the absolute best flavor.
- Vegetables: This classic combination is called a mirepoix. Feel free to use saved vegetable scraps you’ve collected, like leek tops, fennel fronds, and mushroom stems. Just be sure to avoid cruciferous vegetables like broccoli, cabbage, or Brussels sprouts, which can make the stock taste bitter.
- Herbs: If you don’t have fresh herbs, you can substitute 1 teaspoon of dried thyme, but fresh is highly, highly recommended for the best flavor.
- Salt: Did you notice there is no salt in this recipe? That’s on purpose! You’ll salt the final dish you make with the stock. This gives you complete control over the seasoning later on, which is what the pros do.
Step-by-Step Instructions for this Chicken Stock Recipe
Alright, let’s get simmering! Follow these steps, and you’ll be on your way to liquid gold.
- Roast the Bones: Preheat your oven to 425°F. Spread the chicken parts in a single layer on a large baking sheet or in a roasting pan. Let them roast for 30-40 minutes, or until they’re deeply browned and caramelized. This is where the magic starts!
- Add Vegetables: Add the chopped onions, carrots, and celery to the pan with the chicken. Give it all a gentle toss and pop it back in the oven for another 20 minutes until the vegetables are also lightly browned and fragrant.
- Deglaze the Pan: Transfer the roasted chicken and vegetables to a large stockpot (at least 8 quarts). Now, look at that roasting pan. See all those browned bits stuck to the bottom? That’s called the fond, and it’s pure flavor! Pour about 1 cup of water onto the hot pan and use a wooden spoon to scrape up all those glorious bits. Pour this flavorful liquid right into the stockpot.
- Add Aromatics & Water: Add the halved garlic head, parsley, thyme, bay leaves, and peppercorns to the pot. Pour in enough cold water to cover everything by about 2 inches.
- Simmer Gently: Bring the pot to a very gentle simmer over medium-high heat. I can’t stress this enough: do not let it come to a rolling boil. Once you see those first few bubbles, reduce the heat to low. A bubble or two should break the surface every few seconds. That’s the perfect temp.
- Skim and Simmer: Let the stock simmer uncovered for at least 4 hours, and honestly, up to 8 hours if you have the time. The longer, the better. During that first hour, you’ll see some foam or scum rise to the surface. Use a ladle to gently skim that off and discard it.
- Strain the Stock: Carefully pour the stock through a fine-mesh sieve into another large pot or heatproof bowl. For an extra-clear, restaurant-quality stock, I like to line the sieve with a layer of cheesecloth. You can discard the solids now—they’ve given you all their goodness.
- Cool and Defat: Let the strained stock cool to room temperature. A pro tip for faster cooling is to place the pot in an ice bath in your sink. Once it’s cool, cover and refrigerate it overnight. The next day, the fat will have solidified into a neat layer on top that you can easily scrape off and discard (or save for roasting potatoes!).
Pro Tips for Success
Ever wondered how to get those perfectly clear, rich results? Here are a few of my go-to tips.
- Simmer, Don’t Boil: I know I said it before, but it’s the most important rule! Boiling the stock will agitate the proteins and fats, resulting in a cloudy, greasy final product. The gentlest simmer is your best friend.
- Start with Cold Water: Covering the ingredients with cold water helps draw out the collagen and flavor slowly and gently, leading to a clearer, more flavorful stock.
- Skim the Scum: That foam that rises to the top in the first hour contains impurities. Skimming it off is absolutely crucial for a clean-tasting, beautiful stock.
- The Jiggle Test: Here’s the fun part! A sign of a truly great, collagen-rich stock is that it will be gelatinous and jiggly like Jell-O when it’s fully chilled. This means you’ve extracted all that amazing goodness from the bones! It’s so satisfying to see.
- Keep a “Stock Bag”: I keep a large zip-top bag in my freezer for leftover chicken bones and vegetable scraps (onion ends, carrot peels, celery butts). When it’s full, you’re ready to make stock! It’s a fantastic habit for a no-waste kitchen.
Storage Instructions
So you’ve made a big, beautiful batch of stock. Here’s how I store mine for later.
Refrigerator
- Store your chicken stock in airtight containers or jars in the refrigerator for up to 5 days.
Freezer
- Chicken stock freezes beautifully for up to 6 months.
- For Soups & Stews: I like to freeze it in 2-cup or 4-cup portions using deli containers, freezer-safe jars (just be sure to leave about 1-inch of headspace for expansion), or those amazing silicone molds like Souper Cubes.
- For Pan Sauces: This is a great hack! Pour stock into ice cube trays. Once frozen, transfer the cubes to a freezer bag. You can grab one or two cubes whenever you need a small burst of flavor.
- To Save Space: Pour cooled stock into freezer-safe zip-top bags, press out all the air, and lay them flat on a baking sheet to freeze. Once they’re solid, you can stack them like books to save a ton of space.
Frequently Asked Questions (FAQ) About This Chicken Stock Recipe
Got questions? I’ve got answers! Here are a few things people often ask.
What’s the difference between chicken stock and chicken broth?
Great question! Stock is made primarily from simmering bones, which results in a richer, more viscous liquid that’s full of collagen. Broth, on the other hand, is typically made from simmering meat and has a lighter body and flavor. This recipe is a true, rich stock.
Why is my chicken stock cloudy?
Cloudiness is usually caused by one of two things: boiling the stock instead of gently simmering it, or by not skimming the scum off at the beginning of the cooking process. It’s still perfectly fine to use, but a clear stock is a sign of a well-made one!
Can I make chicken stock in a slow cooker or Instant Pot?
Yes, absolutely! They are fantastic tools for this.
– Slow Cooker: Follow steps 1-3 for roasting. Transfer everything to the slow cooker, add water, and cook on low for 8-12 hours.
– Instant Pot / Pressure Cooker: Follow steps 1-3. Transfer everything to the Instant Pot, add water up to the max fill line, and cook on high pressure for 2 hours. Let the pressure release naturally for the best results.
My finished stock didn’t gel. What went wrong?
A gelatinous stock comes from collagen, which is found in bones and connective tissue. If your stock didn’t gel, it likely means the ratio of water to bones was a bit too high, or you didn’t use enough collagen-rich parts like backs, wings, and necks. Don’t worry, it will still taste absolutely delicious!
The Gift of Flavor
You’ve done it! You now have a stash of the most flavorful chicken stock that will instantly make you a better, more intuitive cook. This liquid gold is the foundation for countless amazing meals. Now that you’ve mastered the technique for this homemade chicken stock recipe, you’ll never go back to the box. We’d love to see what you create—leave a comment and rating below to let us know how your liquid gold turned out! Here you can check our latest Red Snapper Recipe.
I am a passionate recipe developer and food enthusiast specializing in heart-warming traditional dishes and simple, everyday meals. My goal is to inspire you to find joy and confidence in the kitchen through my easy-to-follow recipes.