Hey everyone, it’s your friend from scooks.com! Let’s talk about a universal truth: the absolute, undeniable temptation of raw cookie dough. Who among us hasn’t snuck a little (or a big!) spoonful from the mixing bowl, ignoring that little voice in our heads? I know I have! But what if I told you that you could have all that forbidden-treat-bliss without any of the worry? Well, get your spoons ready, because that’s exactly what we’re doing today. I’m so excited to share the only edible cookie dough recipe you will ever need. It’s completely safe, unbelievably delicious, and ready in minutes. It tastes exactly like the real deal.
Read Also: Top Funny Halloween Baking T-Shirts
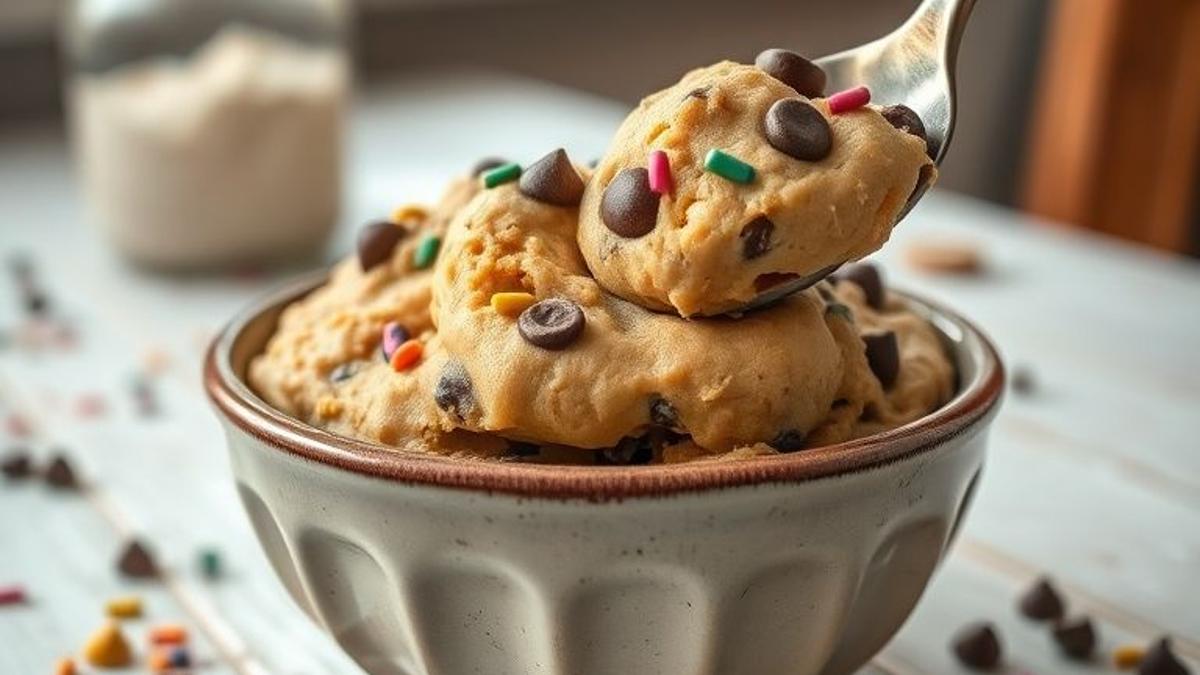
Why You’ll Love This Recipe
Honestly, what’s not to love? This recipe has become a staple in my house for a reason. It’s just that good.
- 100% Safe to Eat: We’re using heat-treated flour (don’t worry, it’s super easy!) and absolutely no raw eggs. You can dig in with complete and total peace of mind.
- Ready in 15 Minutes: Seriously. There’s no chilling required, no waiting for an oven to preheat. Just pure, instant cookie dough gratification.
- Classic Cookie Dough Flavor: This isn’t some imitation. It’s perfectly buttery, packed with those rich vanilla and brown sugar notes that we all crave. It’s nostalgia in a bowl.
- Endlessly Customizable: Think of this as your perfect blank canvas! We’ll start with classic chocolate chips, but I’ll give you tons of ideas to make it your own.
- The Ultimate No-Bake Treat: This is my go-to easy dessert for movie nights, last-minute party contributions, or just because it’s a Tuesday and you deserve a treat.
Ingredients for Edible Cookie Dough
Here’s what you’ll need to grab from the pantry. The list is simple, which is another reason this is the best edible cookie dough recipe around!
For the Cookie Dough
- 1 cup All-Purpose Flour
- ½ cup Unsalted Butter, softened to room temperature
- ½ cup Light Brown Sugar, packed
- ¼ cup Granulated Sugar
- 2 tablespoons Milk (or heavy cream)
- 1 teaspoon Vanilla Extract
- ¼ teaspoon Fine Sea Salt
- ½ cup Mini Chocolate Chips
Notes on Ingredients & Substitutions
- Flour: This is the most important part! Raw flour can carry bacteria, so we must heat-treat it first to make it safe. I’ll show you how below. For a gluten-free version, a good 1-to-1 gluten-free baking flour blend (like Bob’s Red Mill) works beautifully.
- Butter: For a vegan or dairy-free version, just swap in your favorite high-quality vegan butter stick. Make sure it’s softened, not melted!
- Sugars: The combination is key! Brown sugar brings that classic molasses-rich, chewy flavor, while the granulated sugar adds sweetness and a bit of structure. Don’t skip either one!
- Milk: Any kind of milk works here. Whole milk or heavy cream will give you a richer, creamier dough, but 2% or even skim is fine. For a dairy-free option, oat or almond milk are fantastic substitutes.
- Mix-ins: Mini chocolate chips are classic for a reason, but don’t let that stop you from getting creative! Try rainbow sprinkles, chopped pecans or walnuts, crunchy toffee bits, or even mini M&M’s. What will you try first?
Step-by-Step Instructions
Alright, let’s get mixing! This comes together so fast, you’ll be amazed.
Step 1: Heat-Treat the Flour
This step is non-negotiable for safety, but I promise it’s a breeze. You have two options:
- Oven Method (My favorite!): Preheat your oven to 350°F. Spread the flour evenly on a baking sheet. Bake for 5-7 minutes, or until the flour reaches an internal temperature of 165°F on an instant-read thermometer. Let it cool completely before using.
- Microwave Method: Place the flour in a microwave-safe bowl. Heat on high in 30-second intervals, stirring between each one, for about 1 minute and 30 seconds total. Again, you’re looking for that magic 165°F temperature. Let it cool completely.
Step 2: Cream the Butter and Sugars
In a large bowl using a hand mixer, or in the bowl of a stand mixer, beat the softened butter, packed light brown sugar, and granulated sugar together on medium-high speed. Keep mixing for about 2-3 minutes until it’s light, pale, and fluffy. This step dissolves the sugar and incorporates air, which is key to a smooth texture!
Step 3: Add the Wet Ingredients
Pour in the vanilla extract and 2 tablespoons of milk. Mix on low speed until they are just combined. Don’t overmix here!
Step 4: Combine the Dry and Wet Ingredients
Add the completely cooled, heat-treated flour and the fine sea salt to the butter mixture. Mix on the lowest speed possible just until the flour disappears and a soft dough forms. It’ll look a little crumbly at first, but it will come together.
Step 5: Fold in the Chocolate Chips
Switch to a spatula and gently fold in your mini chocolate chips or other mix-ins until they’re evenly distributed throughout the dough. And that’s it! You’re ready to dig in.
Baker’s Tips for Success
Want to make sure your edible cookie dough is perfect every single time? Here are a few of my best tips.
- Don’t Skip the Heat-Treating! I know I’ve said it before, but it’s the most critical step for making a truly safe-to-eat edible cookie dough recipe. Please don’t skip it!
- Use Room Temperature Butter: Properly softened butter (you should be able to press an indent into it easily, but it shouldn’t be greasy or melted) is the secret to a smooth, creamy, non-greasy texture. Cold butter won’t cream properly, and melted butter will make the dough oily.
- Measure Flour Correctly: Instead of scooping directly from the bag, use a spoon to fluff up your flour and then gently spoon it into your measuring cup. Level it off with the back of a knife. This prevents you from packing in too much flour, which can lead to a dry, dense dough.
- Start with Less Milk: The dough might seem a little dry at first. I suggest starting with 2 tablespoons of milk and only adding more, 1 teaspoon at a time, if it’s still too stiff after mixing. You can always add more, but you can’t take it away!
- Go Mini: Mini chocolate chips are the way to go here! Their smaller size means you get more chocolatey goodness in every single bite and a much better overall texture. Trust me on this one.
Storage Instructions
If you somehow have leftovers (which is rare in my house!), here’s how to store them.
Refrigerating
Store the cookie dough in an airtight container in the refrigerator for up to one week. It will firm up when cold, so you may want to let it sit at room temperature for 10-15 minutes before enjoying.
Freezing
This dough freezes beautifully! You can freeze it as a single block in a freezer-safe bag, or my favorite method: use a small cookie scoop to portion it into single-serving balls. Place them on a parchment-lined baking sheet, freeze until solid, then transfer to a freezer bag. They’ll last for up to 3 months and you’ll have a perfect treat ready to go whenever a craving strikes!
Frequently Asked Questions (FAQ)
Is this edible cookie dough recipe actually safe to eat?
Yes, 100%! We ensure safety in two key ways: first, by heat-treating the flour to eliminate any potential bacteria, and second, by completely omitting the eggs, which removes the risk of salmonella. You can enjoy this treat with total confidence.
Can I bake this cookie dough into cookies?
No, I wouldn’t recommend it. This recipe is specifically formulated for eating raw. It lacks crucial ingredients like eggs (which provide structure) and leavening agents like baking soda or baking powder. Without them, the dough won’t rise or bake into a proper cookie—it would just melt into a flat, greasy puddle.
How can I make this recipe vegan?
It’s so easy to make this vegan! Simply use your favorite brand of vegan butter sticks (not the kind in a tub) and a non-dairy milk like almond, soy, or oat milk. Also, be sure to double-check that your chocolate chips are dairy-free.
Why is my cookie dough grainy?
A grainy texture is usually caused by one of two things. Either the butter and sugars weren’t creamed together long enough to dissolve the sugar crystals, or you used a brand of granulated sugar with very large crystals. Make sure you beat them together until they are truly light and fluffy!
What are some other ways to serve this cookie dough?
Oh, the possibilities are endless! I love scooping it onto a bowl of vanilla ice cream, using it as a dip for salty pretzels or apple slices, or even sandwiching a layer between two fudgy brownies for an ultra-decadent dessert.
The Best Treat, No Oven Required!
And there you have it—a simple, safe, and unbelievably delicious edible cookie dough recipe that will satisfy all your cravings without ever having to turn on the oven. It’s the perfect quick fix for your sweet tooth and a guaranteed crowd-pleaser.
I can’t wait to hear what you think! If you try this recipe, please leave a comment and a rating below. And definitely let me know what your favorite mix-in combinations are. Happy (no) baking!
I am a passionate recipe developer and food enthusiast specializing in heart-warming traditional dishes and simple, everyday meals. My goal is to inspire you to find joy and confidence in the kitchen through my easy-to-follow recipes.