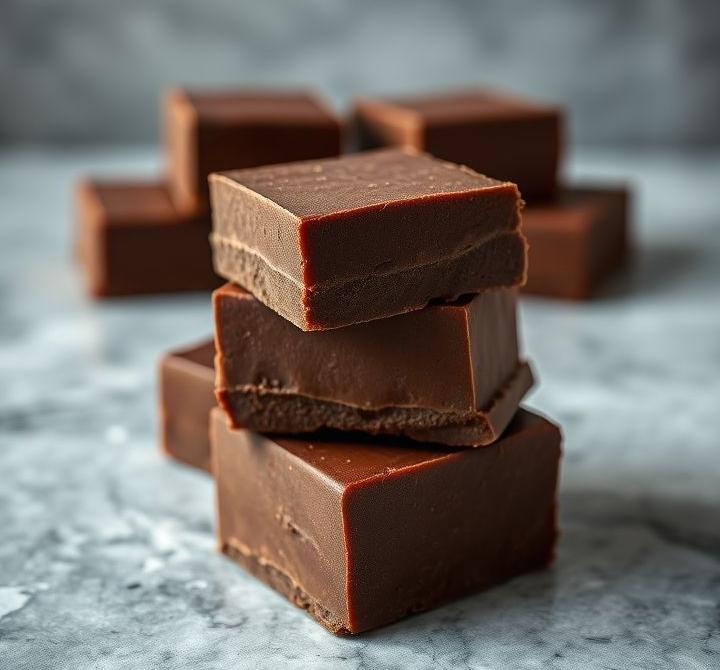
Hey there, fellow sweet tooths and kitchen adventurers! I’m so thrilled you’ve landed on scooks.com today, because we’re about to dive headfirst into a classic that’s truly legendary: the Fantasy Fudge Recipe Jet Puff. If you’ve ever dreamt of making homemade fudge that’s unbelievably creamy, perfectly sweet, and practically melts in your mouth, then you’re in for a treat. This isn’t just any fudge recipe; it’s the recipe, the one your grandma probably made, updated with all my best tips and tricks to ensure absolute success. Forget grainy, crumbly fudge – we’re going for smooth, dreamy perfection, every single time. Ready to whip up some magic?
Why You’ll Love This Fantasy Fudge Recipe
Oh, where do I even begin? This isn’t just a recipe; it’s a memory maker! First off, the Fantasy Fudge Recipe Jet Puff is notoriously easy. Seriously, if you can stir and measure, you can make this fudge. You don’t need a candy thermometer (though I’ll give you tips if you want to use one!), and it comes together surprisingly quickly. I absolutely love how versatile it is, perfect for holiday platters, a thoughtful homemade gift, or just a Tuesday night craving (no judgment here!). That signature creaminess? It’s all thanks to the special combination of ingredients, including those wonderful Jet-Puffed marshmallows that give it that irresistible, smooth texture. You’ll impress everyone with this, and honestly, you’ll be so proud of what you’ve created. It’s a true crowd-pleaser that never goes out of style.
Ingredients for Fantasy Fudge
Gather ’round, my friends, because these simple ingredients are about to transform into something truly spectacular! This is the classic list for a reason – it just works. Make sure you have everything measured out and ready to go before you start, because once the cooking begins, things move pretty fast!
- 1 ½ cups granulated sugar
- ¾ cup (1 ½ sticks) unsalted butter
- ⅔ cup evaporated milk (not sweetened condensed milk!)
- 1 (12-ounce) package semi-sweet chocolate chips
- 1 (7-ounce) jar Jet-Puffed Marshmallow Creme (or roughly 3 cups mini Jet-Puffed marshmallows)
- 1 teaspoon vanilla extract
- Pinch of salt (optional, but I always add it to enhance the flavors!)
- 1 cup chopped walnuts or pecans (optional, but highly recommended for a delicious crunch!)
Step-by-Step Instructions for Perfect Fantasy Fudge
Alright, let’s get cooking! Follow these steps closely, and you’ll have a batch of the best fudge you’ve ever tasted. Remember, a little patience and attention to detail go a long way with this Fantasy Fudge Recipe Jet Puff.
- Prep Your Pan: First things first, grab a 9×13-inch baking pan. Line it with parchment paper, making sure the paper hangs over the sides a bit. This creates handy ‘handles’ for easy fudge removal later! Lightly grease the parchment paper with butter or cooking spray. Set aside.
- Combine & Boil: In a heavy-bottomed 3-quart saucepan, combine the granulated sugar, butter, and evaporated milk. Place it over medium heat. Stir constantly until the sugar dissolves and the butter is melted. Bring the mixture to a full, rolling boil that you can’t stir down. Keep boiling and stirring for exactly 5 minutes. This step is crucial for the fudge’s texture, so don’t skimp on the time!
- Remove & Add: Immediately remove the saucepan from the heat. Quickly add the chocolate chips, Jet-Puffed Marshmallow Creme (or mini marshmallows), vanilla extract, and that optional pinch of salt. Don’t stir just yet! Let it sit undisturbed for about 1-2 minutes. This allows the heat to gently melt the chocolate and marshmallows.
- Stir to Perfection: Now, with a sturdy spoon or spatula, begin stirring vigorously. Stir, stir, stir until everything is completely melted, smooth, and beautifully combined. There shouldn’t be any streaks of white marshmallow or unmelted chocolate. If you’re adding nuts, fold them in now until evenly distributed.
- Pour & Set: Quickly pour the hot fudge mixture into your prepared 9×13-inch pan. Using an offset spatula or the back of a spoon, spread it evenly. Don’t worry too much about making it perfectly smooth; it’ll taste amazing no matter what! Let the fudge cool completely at room temperature for at least 4 hours, or pop it in the refrigerator for about 2-3 hours to speed up the setting process.
- Cut & Enjoy: Once the fudge is firm, use those parchment paper ‘handles’ to lift the entire slab out of the pan. Place it on a cutting board. With a sharp, warm knife (run it under hot water and wipe dry between cuts), cut the fudge into 1-inch squares. Now, try to resist eating it all at once! You’ve just mastered the Fantasy Fudge Recipe Jet Puff!
Baker’s Tips & Pro Secrets for Fudge Success
Want to elevate your fudge game even further? As your friendly expert blogger, I’ve got a few secrets up my sleeve to ensure your Fantasy Fudge Recipe Jet Puff turns out flawlessly every single time.
- Read Through First: I can’t stress this enough! Read the entire recipe before you even touch an ingredient. This helps you understand the flow and avoids panic when things move quickly.
- Ingredient Quality Matters: Use good quality chocolate chips! It truly makes a difference in the final flavor. And of course, the Jet-Puffed marshmallows are key for that signature smooth texture.
- Don’t Over-Boil: That 5-minute boil time is precise. Boiling for too long can result in dry, crumbly fudge, while not boiling enough can make it too soft or not set properly.
- Stir, Stir, Stir (the Right Way): When you’re boiling, constant stirring prevents scorching on the bottom. After adding the chocolate and marshmallows, make sure to stir until completely smooth. Any lumps or streaks will affect the texture.
- Patience is a Virtue: Resist the urge to cut into the fudge before it’s fully set. It needs that time to firm up properly. Chilling in the fridge is fine, but room temperature setting often yields a slightly creamier result.
- Clean Cuts: For beautiful, neat squares, use a sharp knife and clean it with hot water and wipe dry after every few cuts. This prevents sticking and dragging.
Storage Instructions for Homemade Fudge
So, you’ve made a glorious batch of fudge (and hopefully saved some!). Here’s how to keep your homemade goodness fresh and delicious:
- Room Temperature: Store your fudge in an airtight container at room temperature for up to 2 weeks. Layer the pieces between sheets of wax paper or parchment paper to prevent sticking.
- Refrigerator: If you prefer a firmer fudge, or if your kitchen is particularly warm, you can store it in an airtight container in the refrigerator for up to 3-4 weeks. Again, use wax paper between layers.
- Freezer: Fudge freezes beautifully! Wrap individual pieces or small blocks tightly in plastic wrap, then place them in a freezer-safe bag or airtight container. It will keep well for up to 3 months. Thaw at room temperature before serving.
Frequently Asked Questions (FAQ)
- Q: Can I use regular marshmallows instead of Jet-Puffed Marshmallow Creme?
A: Yes! A 7-ounce jar of marshmallow creme is roughly equivalent to 3 cups of mini Jet-Puffed marshmallows. They both work wonderfully for this Fantasy Fudge Recipe Jet Puff. - Q: My fudge turned out grainy. What went wrong?
A: Grainy fudge usually happens if the sugar didn’t fully dissolve during the boiling step, or if you scraped down the sides of the pan after boiling, reintroducing crystallized sugar. Make sure to stir well and avoid scraping after the boil! - Q: Can I double this recipe?
A: I generally don’t recommend doubling fudge recipes, as it can affect the boiling time and overall consistency. It’s better to make two separate batches if you need a larger quantity. - Q: What if my fudge doesn’t set?
A: This often means the mixture wasn’t boiled long enough. Make sure you get a full, rolling boil for the entire 5 minutes. You can sometimes salvage soft fudge by re-melting it gently in a double boiler, adding a tablespoon of evaporated milk, and then bringing it back to a boil for a minute or two before pouring it into a clean, prepared pan.
Indulge in Your Homemade Fantasy Fudge!
There you have it, folks! Your complete guide to mastering the incredible Fantasy Fudge Recipe Jet Puff. I truly hope you feel empowered and excited to try this in your own kitchen. There’s nothing quite like the satisfaction of biting into a piece of perfectly smooth, rich, homemade fudge, knowing you made it yourself. It’s a little slice of heaven, and it’s perfect for sharing (or not, I won’t tell!). So go ahead, gather your ingredients, follow these steps, and prepare to indulge in some seriously fantastic fudge. Don’t forget to tell me how it turned out in the comments below – I absolutely love hearing about your kitchen adventures!
More Delicious Recipes
If you enjoyed the magic of making homemade sweets, you might also love these other delightful dessert recipes!
* The Best Chocolate Chip Cookie Recipe
I am a passionate recipe developer and food enthusiast specializing in heart-warming traditional dishes and simple, everyday meals. My goal is to inspire you to find joy and confidence in the kitchen through my easy-to-follow recipes.
This recipe calls for 1 1/2 cups of sugar is wrong I believe it should have been 3 cups. Did this recipe as you have written and it pour out like chocolate milk. I thought it was off but did as you said.