Hey everyone! So, Halloween was a blast, right? The costumes, the spooky movies… and now, the giant, overflowing bowl of candy sitting on your counter. Ever find yourself staring at it, wondering what on earth you’re going to do with it all? I’ve been there! Well, I’ve got the most delicious solution for you. Turn that treasure trove of treats into the most decadent, shareable, and ridiculously easy dessert of the season! This Leftover Halloween Candy Skillet Cookie is a warm, gooey, giant chocolate chip cookie baked in a single pan and absolutely loaded with all your favorite fun-sized candy bars. It’s my family’s favorite tradition and truly the ultimate leftover Halloween candy recipe to give that candy stash a delicious second life.
Why You’ll Love This Leftover Halloween Candy Recipe
Seriously, what’s not to love? If you’re not already convinced, here’s why this skillet cookie is about to become your new favorite fall dessert.
- The Perfect Stash-Buster: Finally, a delicious purpose for all those random Snickers, Reese’s, and M&M’s! It’s such a satisfying way to clear out the candy bowl.
- One-Pan Wonder: It’s all mixed in one bowl and baked in one skillet. That means minimal cleanup and maximum enjoyment. You know I’m a huge fan of that!
- Endlessly Customizable: Use whatever chocolate candy you have on hand. It’s a different adventure every single time you make it. Have fun with it!
- Warm, Gooey, & Crowd-Pleasing: Served warm, right from the pan, with a giant scoop of vanilla ice cream melting on top? Oh, yeah. This is the kind of dessert that brings everyone together.
Read Also: The BEST Jack O’ Lantern Stuffed Peppers (Easy Halloween Recipe!)
Ingredient List
Here’s what you’ll need to gather. Don’t worry, it’s mostly pantry staples!
For the Skillet Cookie Base
- Unsalted Butter: 1 cup (2 sticks), softened. My little note: If you only have salted butter, just reduce the added salt in the recipe to ¼ teaspoon.
- Light Brown Sugar: 1 cup, packed.
- Granulated Sugar: ½ cup.
- Large Eggs: 2, at room temperature. This really helps them mix into the batter smoothly!
- Pure Vanilla Extract: 2 teaspoons.
- All-Purpose Flour: 2 ½ cups. A pro tip: Spoon your flour into the measuring cup and level it off with a knife for the most accurate measurement. It makes a difference!
- Baking Soda: 1 teaspoon.
- Salt: ½ teaspoon.
- Semi-Sweet Chocolate Chips: 1 cup. Feel free to substitute with milk or dark chocolate chips, or you can even leave them out if your candy stash is extra chocolatey.
For the Candy Mix-ins
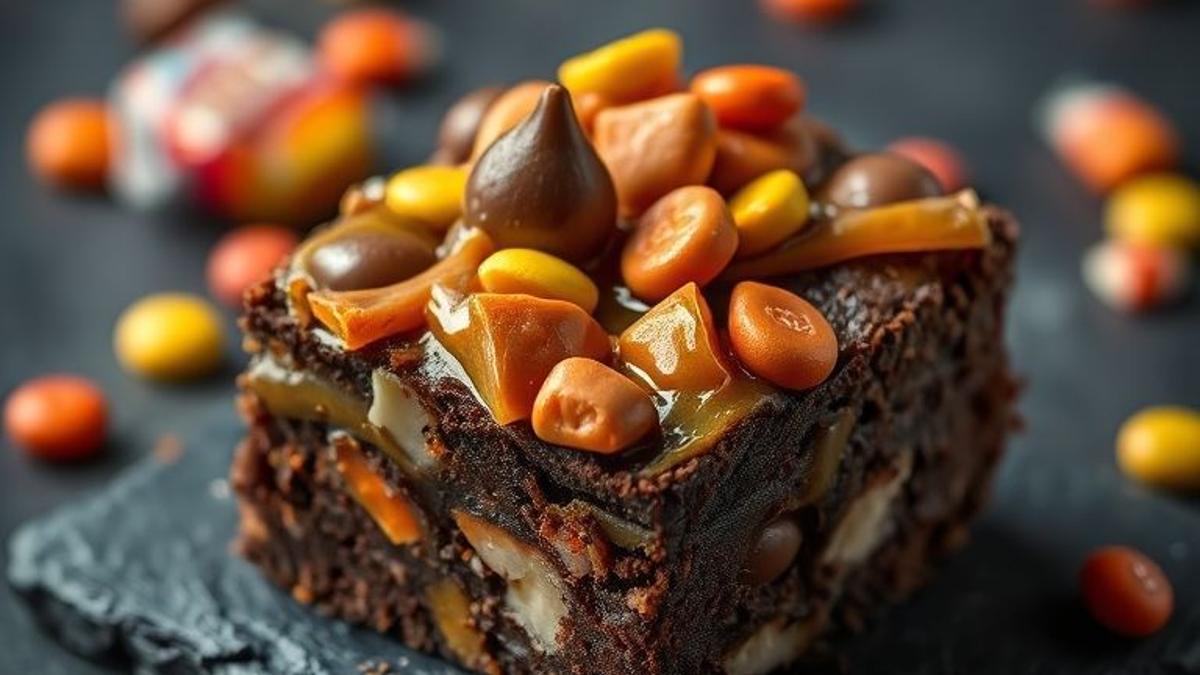
- Chopped Halloween Candy: 2 cups, divided. The best choices are chocolate-based candies like Snickers, Reese’s Cups, Twix, Kit Kats, and M&M’s. I’d steer clear of gummy or hard candies, as they tend to melt into a weird, sticky mess.
Step-by-Step Instructions
Alright, let’s get baking! This comes together so fast, you’ll be amazed.
Step 1: Prep Oven and Skillet
- Preheat your oven to a cozy 350°F (175°C).
- Generously grease a 10-inch cast-iron skillet with butter. Don’t be shy here; you want every slice to come out cleanly.
Step 2: Cream Butter and Sugars
- In a large mixing bowl, beat the softened butter, brown sugar, and granulated sugar with an electric mixer on medium-high speed. You’re looking for the mixture to get light and fluffy, which usually takes about 2-3 minutes.
Step 3: Add Wet Ingredients
- Beat in the eggs one at a time, making sure to mix well after each one before adding the next.
- Stir in the vanilla extract. Your kitchen should be smelling pretty amazing right about now!
Step 4: Combine Dry Ingredients
- In a separate, medium-sized bowl, whisk together the all-purpose flour, baking soda, and salt. This little step ensures you don’t get any salty or bitter pockets in your cookie.
- With the mixer on its lowest speed, gradually add the dry ingredients to the wet ingredients until they’re just combined. Seriously, be careful not to overmix! Overmixing develops gluten and can make the cookie tough.
Step 5: Fold in the Candy and Chips
- Time for the best part! Using a spatula, gently fold in the chocolate chips and 1 ½ cups of your chopped Halloween candy.
- Reserve that remaining ½ cup of candy. We’ll use it for the topping to make it look extra irresistible.
Step 6: Assemble and Bake
- Spread the cookie dough evenly into the bottom of your prepared cast-iron skillet. I use the back of a spoon to get it all the way to the edges.
- Sprinkle the reserved ½ cup of candy pieces evenly over the top of the dough, pressing them in just slightly.
- Bake for 25-30 minutes. The edges should be a beautiful golden brown, and a toothpick inserted into the center should come out with moist crumbs, but not wet batter.
Step 7: Cool and Serve
- Carefully remove the hot skillet from the oven—it will be screaming hot!—and place it on a wire rack to cool for at least 20 minutes. The cookie will continue to set as it cools.
- Serve it up warm, cut into wedges, and don’t you dare forget that scoop of vanilla ice cream. It’s practically mandatory!
Baker’s Tips for Success
Want to totally nail this recipe? Here are a few of my tried-and-true tips.
- Don’t Overbake: My most important tip for this leftover Halloween candy recipe! The key to a perfectly gooey center is to pull the skillet from the oven when the middle still looks a tiny bit underdone. It will finish cooking from the residual heat of the hot cast iron. Trust me on this one.
- Chop Candy Correctly: For the best texture, cut your candy bars into chunky ½-inch pieces. You want to get noticeable bits of candy in every bite, not just candy dust. For smaller things like M&M’s or Reese’s Pieces, you can leave them whole.
- No Cast-Iron Skillet? No problem at all. You can bake this in a 9-inch round cake pan or a deep-dish pie plate. Just keep a close eye on the baking time, as it might cook a minute or two faster.
- Add Flaky Sea Salt: A little sprinkle of flaky sea salt over the top of the warm cookie is a game-changer. It perfectly balances all that sweetness from the candy and makes the chocolate flavors pop!
Storage Instructions
If you somehow have leftovers (I’m always impressed when people do!), here’s how to store them.
- At Room Temperature: Allow the skillet cookie to cool completely, then just cover the skillet tightly with aluminum foil. It will stay wonderfully fresh for up to 3 days.
- Reheating: To get back that fresh-from-the-oven gooeyness, you can warm individual slices in the microwave for about 15-20 seconds. Perfection!
Frequently Asked Questions (FAQ)
What are the best candies to use in this recipe?
- The best candies for this leftover Halloween candy recipe are definitely chocolate-based! Think Snickers, Milky Way, Twix, Reese’s Peanut Butter Cups, Butterfingers, M&M’s, and chopped Hershey’s bars—they are all fantastic choices. I’d advise against using gummy candies (like gummy bears) or hard candies (like Jolly Ranchers) because they don’t bake well and can create a sticky, hard mess.
Can I make the cookie dough ahead of time?
- Yes, you absolutely can! You can prepare the dough (without the candy mixed in) and store it in an airtight container in the refrigerator for up to 3 days. When you’re ready to bake, just let it sit at room temperature for about 30 minutes to soften slightly before you mix in the candy and press it into the skillet.
Why is my skillet cookie dry?
- Oh no! This is almost always a sign of overbaking. A skillet cookie is at its best when it’s super soft and gooey in the middle. Remember to pull it from the oven when the center still looks a little soft. The hot cast-iron skillet retains so much heat and will continue to cook the center to perfection as it cools on the counter.
Time to Raid That Candy Bowl!
This Halloween Candy Skillet Cookie is more than just a recipe; it’s a delicious, fun solution to that sweet post-holiday problem. It’s so forgiving and the perfect way to keep the Halloween spirit going just a little bit longer. I really hope you love this leftover Halloween candy recipe as much as my family does. We can’t wait to see what amazing candy combinations you all create! If you try it, please leave a comment and a rating below, and don’t forget to tag us @scooks on Instagram so we can see your masterpiece!
I am a passionate recipe developer and food enthusiast specializing in heart-warming traditional dishes and simple, everyday meals. My goal is to inspire you to find joy and confidence in the kitchen through my easy-to-follow recipes.