Hey there, fellow bakers! Is there any aroma more comforting than warm cinnamon and sugar wafting from the oven? I don’t think so. It’s the scent of pure nostalgia, of after-school treats and holiday gatherings. For me, that smell is completely tied to one cookie: the snickerdoodle. We’re talking about a cookie that’s pure magic—pillowy soft, unbelievably chewy, with crispy, buttery edges and that signature tangy sweetness that makes it stand out from any other cookie on the plate.
For years, I searched for the perfect Snickerdoodle Cookie Recipe. Some were too flat, others too cakey. But this one? Oh, this one is it. This is the foolproof recipe that will give you the most incredible, bakery-quality snickerdoodles you’ve ever had, right from your very own kitchen. Get ready for your house to smell amazing!
Read Also: Easy & Authentic Borscht Recipe (Ukrainian Beet Soup)
Why You’ll Love This Snickerdoodle Cookie Recipe
I could go on and on, but here are the top reasons this recipe will become your new go-to.
Chewy Centers and Crispy Edges
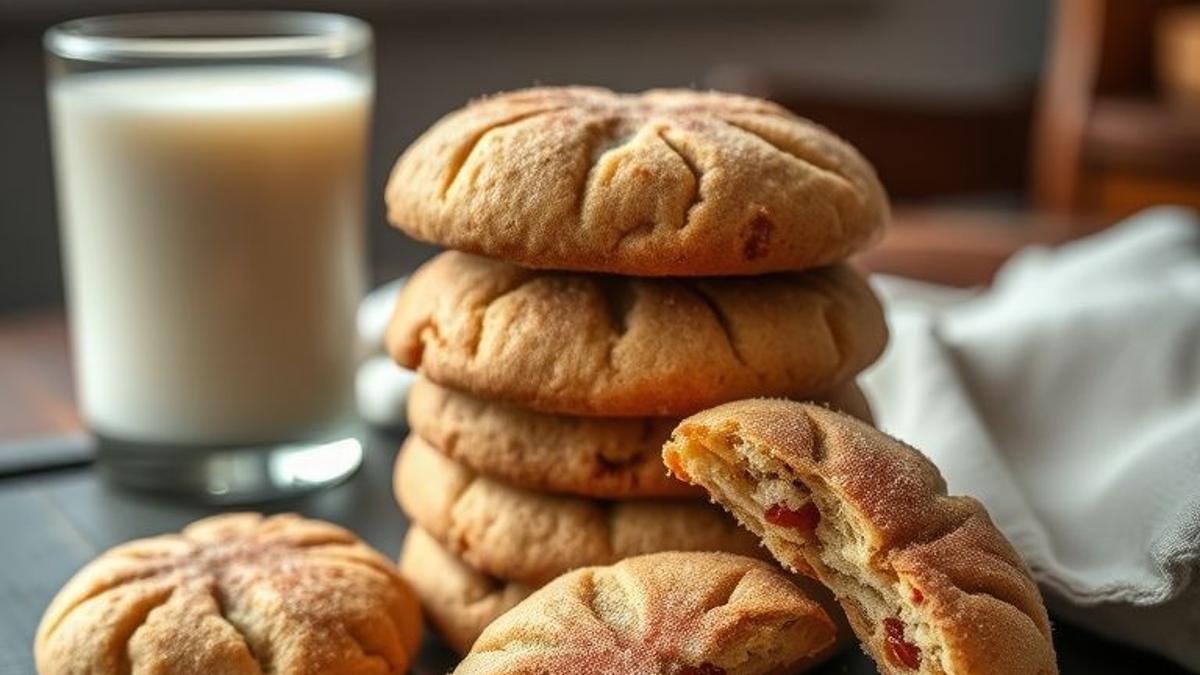
This isn’t just a cookie; it’s a texture masterpiece. The edges get just the right amount of golden crispness, giving way to a soft, thick, and wonderfully chewy center. It’s the best of both worlds in every single bite.
No-Chill Dough
I know, right?! Sometimes you just need a cookie now. This dough is a dream to work with and requires absolutely zero chill time. You can literally go from mixing bowl to warm, delicious cookie in under 30 minutes. Instant gratification at its finest!
Simple Pantry Ingredients
No need for a special trip to the store. This recipe uses basic baking staples you probably have on hand right now—flour, sugar, butter, eggs. And don’t worry about the one special ingredient; it’s the secret to that authentic snickerdoodle tang, and it’s easier to find than you think!
The Ultimate Crowd-Pleaser
A plate of warm snickerdoodles disappears faster than just about anything else I bake. They’re a timeless classic for a reason! Perfect for holiday cookie swaps, school bake sales, or just a cozy afternoon treat with a glass of milk.
Ingredients You’ll Need
Let’s gather our ingredients! The key to this amazing Snickerdoodle Cookie Recipe is using simple, quality ingredients.
For the Cookie Dough
- All-Purpose Flour: The backbone of our cookies! It’s super important to measure it correctly. Instead of scooping from the bag, use a spoon to fill your measuring cup and then level it off with a knife. This prevents dense, dry cookies.
- Cream of Tartar: Here it is—the secret weapon! This is what gives snickerdoodles their signature tangy flavor and incredibly soft, chewy texture. It’s not just a suggestion; it’s what makes a snickerdoodle a snickerdoodle!
- Baking Soda: This is our leavening agent. It reacts with the cream of tartar to give the cookies their perfect puff and crackly tops.
- Salt: Just a little bit to balance all that sweetness and make the cinnamon and vanilla flavors pop.
- Unsalted Butter: Make sure it’s properly softened to room temperature—not melted! You should be able to press your finger into it and leave an indent easily. If you only have salted butter, just reduce the added salt in the recipe by 1/4 teaspoon.
- Granulated Sugar: Provides the sweetness and helps create that tender structure.
- Large Eggs: These should also be at room temperature. Quick tip: If you forget to take them out, just place them in a bowl of warm (not hot!) water for about 5-10 minutes.
- Pure Vanilla Extract: A splash of good quality vanilla adds a beautiful depth of flavor.
For the Cinnamon-Sugar Coating
- Granulated Sugar
- Ground Cinnamon: This is where the magic happens! I recommend using a good quality cinnamon because its flavor really shines through. You can really taste the difference.
How to Make the Best Snickerdoodles: Step-by-Step Instructions
Alright, let’s get baking! This is such a fun and easy process.
Step 1: Prepare for Baking
First things first, preheat your oven to a hot 400°F (200°C). That higher temperature helps the cookies puff up quickly and get those signature cracks. Line two large baking sheets with parchment paper for easy cleanup.
Step 2: Mix the Cinnamon-Sugar Coating
In a small, shallow bowl, whisk together the sugar and ground cinnamon for that irresistible coating. Give it a good mix and set it aside for later.
Step 3: Whisk the Dry Ingredients
In a medium-sized bowl, whisk together the all-purpose flour, cream of tartar, baking soda, and salt. Whisking them together now ensures everything is evenly distributed, which means no surprise salty bites!
Step 4: Cream the Butter and Sugar
In a large bowl, using a stand mixer fitted with a paddle attachment or a hand mixer, beat the softened butter and granulated sugar on medium-high speed. Keep going for about 2-3 minutes until the mixture is super light, pale, and fluffy. This step whips air into the dough, which is key for a soft cookie.
Step 5: Add Eggs and Vanilla
Add the room temperature eggs one at a time, making sure to beat well after each one is added. Scrape down the sides of the bowl as needed. Once the eggs are incorporated, mix in the pure vanilla extract.
Step 6: Combine Wet and Dry Mixtures
Turn your mixer down to low speed and gradually add the dry ingredient mixture to the wet ingredients. Mix just until the flour streaks have disappeared. Be careful not to overmix here! Overmixing can lead to tough cookies, and nobody wants that.
Step 7: Shape and Roll the Cookies
Using a medium cookie scoop (about 1.5 tablespoons), portion out the dough. This keeps all your cookies the same size so they bake evenly. Roll each portion into a smooth ball between your palms, then drop it into the cinnamon-sugar mixture. Roll it around until it’s generously coated on all sides. Don’t be shy with the coating!
Step 8: Bake
Place the cinnamon-sugar-coated dough balls onto your prepared baking sheets, leaving about 2 inches of space between them so they have room to spread. Bake for 9-11 minutes. You’ll know they’re done when the edges are set and lightly golden, and the centers look puffy and have those beautiful cracks. They might look slightly underdone in the very middle, and that’s perfect!
Step 9: Cool
Let the cookies cool on the hot baking sheet for about 5 minutes. This allows them to set up a bit. After 5 minutes, transfer them to a wire rack to cool completely. Or, you know, enjoy one warm. I won’t tell!
Baker’s Tips for Perfect Snickerdoodles
Want to absolutely nail this Snickerdoodle Cookie Recipe every single time? Here are my top tips.
Don’t Skip the Cream of Tartar
I’m saying it again because it’s that important! It provides the acid that activates the baking soda, giving the cookies their unique chew and tang. Without it, you’re just making a cinnamon-sugar cookie, which is good… but it’s not a snickerdoodle.
Room Temperature Ingredients are a Must
Softened butter and room temperature eggs are essential. They emulsify together to create a smooth, uniform dough. This traps air, which leads to a lighter, softer cookie texture in the end. It really does make a difference!
Measure Your Flour Correctly
Too much flour is the #1 cause of dry, crumbly cookies. Don’t just scoop your measuring cup into the flour bag! Instead, use a spoon to fluff up the flour in its container, then spoon it into your measuring cup until it’s overflowing. Use the back of a knife to level it off. Perfect measurement, every time.
Do Not Overbake
This is my golden rule for chewy cookies. Pull them out of the oven when the centers still look a tiny bit soft. They will continue to bake and set up from the residual heat of the baking sheet. This little trick is the secret to maintaining that incredible soft and chewy center.
Use a Cookie Scoop
If you don’t have one, I can’t recommend it enough! A cookie scoop ensures that all your cookies are the same size. This isn’t just for looks; it means they all bake evenly, so you don’t have some that are burnt while others are raw.
How to Store Snickerdoodle Cookies
If you’re lucky enough to have leftovers, here’s how to keep them fresh.
Room Temperature
Store your completely cooled snickerdoodles in an airtight container at room temperature. They’ll stay soft and delicious for up to 5 days. Pro tip: Add a slice of plain bread to the container! The cookies will absorb moisture from the bread, keeping them extra soft.
Freezing Baked Cookies
Yes, you can freeze them! Let the cookies cool completely, then place them in a freezer-safe container or zip-top bag, with sheets of parchment paper between the layers to prevent sticking. They’ll keep for up to 3 months. Just thaw at room temperature when you’re ready for a treat.
Freezing the Dough
This is my favorite make-ahead trick. Roll the dough into balls, coat them in the cinnamon-sugar mixture, and place them on a baking sheet. Flash-freeze for about an hour, or until firm. Transfer the frozen dough balls to a freezer bag. You can bake them straight from frozen! Just add an extra 1-2 minutes to the baking time.
Snickerdoodle Recipe FAQ
Got a question? I’ve got answers!
Can I make snickerdoodles without cream of tartar?
Technically, you can substitute it. The common swap is to replace both the cream of tartar and baking soda with 2 teaspoons of baking powder. However, I have to be honest: you will lose the signature tangy flavor and the uniquely chewy texture that defines a snickerdoodle. The result will be a more cake-like cinnamon-sugar cookie.
Why did my cookies spread and become flat?
This is a common cookie conundrum! It’s usually caused by one of three things: your butter was too soft or melted, you didn’t measure your flour correctly (not enough flour), or you placed the dough on a hot baking sheet from a previous batch. Always let your pans cool completely between batches.
Can I make the dough ahead of time?
You sure can! You can prepare the dough, cover it tightly with plastic wrap, and refrigerate it for up to 3 days. When you’re ready to bake, let it sit on the counter for about 20-30 minutes to soften slightly, then scoop, roll, and bake as directed.
My cookies didn’t get the classic cracks on top. What went wrong?
Don’t worry, they’ll still be delicious! The cracks come from the outside of the cookie setting quickly in a hot oven while the inside continues to rise. This could mean your oven temperature is a little off, or perhaps your baking soda or cream of tartar is a bit old and has lost some of its leavening power. But even without perfect cracks, you’ll still have a tasty cookie!
Conclusion
And there you have it—everything you need to know to make the absolute best, softest, chewiest snickerdoodles of your life. This truly is the only Snickerdoodle Cookie Recipe you’ll ever need. It’s simple, it’s reliable, and the results are just pure, cinnamon-sugar bliss.
If you try this recipe, I would be so thrilled to hear how it turned out! Please leave a comment and a star rating below to let me know what you think. Your feedback helps other bakers and makes my day!
Happy Baking!
I am a passionate recipe developer and food enthusiast specializing in heart-warming traditional dishes and simple, everyday meals. My goal is to inspire you to find joy and confidence in the kitchen through my easy-to-follow recipes.