There is a moment, a rare culinary sweet spot, when bright citrus tang meets silken, creamy richness, creating a symphony on the palate. That moment belongs to homemade lemon curd. Forget the pallid, overly sweet, gelatinous versions from a jar; true lemon curd is vibrant, intense, and utterly transcendent. Achieving this perfection isn’t about magic, but precision – understanding the science of eggs, acid, and fat, and mastering the subtle dance of heat. This guide will equip you with the knowledge not just to follow a recipe, but to truly understand and perfect your lemon curd, avoiding common pitfalls and tailoring it to your exact desires.
Essential Ingredients for a Brilliant Curd
Success starts with selection. Don’t compromise on quality here; every ingredient plays a critical role.
- Lemons: 4-5 medium-sized (Eureka or Lisbon for classic tartness). You’ll need approximately 2 tablespoons of zest and 150ml (about 2/3 cup) of fresh juice. Meyer lemons will yield a sweeter, less assertive curd, requiring slight sugar adjustments.
- Granulated Sugar: 150g (about ¾ cup + 1 tablespoon). This provides sweetness and structure.
- Large Egg Yolks: 4. These are the emulsifying and thickening powerhouses. Standard large yolks weigh roughly 18-20g each.
- Whole Large Egg: 1. Adds a touch more liquid and helps with the final texture, preventing it from being too rich.
- Unsalted Butter: 115g (1 stick), cold and cut into 1cm cubes. The fat provides richness, body, and mouthfeel.
- Pinch of Salt: Just a tiny pinch (about 1/8 teaspoon) to balance and amplify the flavors.
Necessary Equipment for Precision
While minimal, certain tools make the process significantly smoother and more reliable.
- Medium Heavy-Bottomed Saucepan: For direct heat, or the bottom pot of a double boiler setup.
- Heatproof Bowl: A stainless steel or glass bowl that fits snugly over your saucepan for a double boiler. This is the safest method for beginners to prevent curdling.
- Whisk: Essential for continuous agitation.
- Fine-Mesh Sieve: Non-negotiable for a truly silken curd.
- Rubber Spatula: For scraping down the sides.
- Instant-Read Thermometer: The absolute best way to ensure proper doneness without overcooking. Aim for 77-82°C (170-180°F).
- Microplane Zester: For efficient, fine zest without the bitter white pith.
- Citrus Juicer: To extract maximum juice.
The Expert’s Method: Crafting Perfect Lemon Curd
Follow these steps with attention to detail for a professional result.
- Prepare Your Lemons: Thoroughly wash and dry your lemons. Use a microplane to zest 2 tablespoons of the yellow peel, being careful to avoid the bitter white pith beneath. Juice the lemons until you have exactly 150ml of fresh juice. Strain the juice to remove any seeds or pulp. This preparation ensures maximum flavor extraction and purity.
- Combine Wet Ingredients: In your heatproof bowl (for a double boiler) or directly in your heavy-bottomed saucepan, whisk together the lemon zest, strained lemon juice, granulated sugar, egg yolks, and the whole egg until thoroughly combined and slightly frothy. The sugar should be mostly dissolved.
- Cook the Curd with Precision:
- Double Boiler Method (Recommended for beginners): Fill your saucepan with about 5cm (2 inches) of water and bring it to a gentle simmer over medium-low heat. Place your bowl with the egg mixture over the simmering water, ensuring the bottom of the bowl does not touch the water.
- Direct Heat Method (For experienced cooks): Place your saucepan with the egg mixture directly over low heat.
Regardless of method, continuously whisk the mixture. This constant motion is crucial for preventing the eggs from scrambling. As it heats, the mixture will thicken. Monitor the temperature with your instant-read thermometer. You are aiming for a temperature range of 77-82°C (170-180°F). Below this, the curd won’t thicken properly; above it, the egg proteins will denature too rapidly and curdle.
The primary cause of grainy or scrambled curd is overheating the egg proteins too quickly or unevenly. Eggs coagulate at around 62-71°C (145-160°F), but with the sugar and acid present, the mixture needs to reach a slightly higher temperature to fully thicken and pasteurize. If you see small white flecks forming (scrambled egg), immediately remove the bowl from the heat and whisk vigorously. Sometimes, if caught early, a quick immersion in an ice bath can halt further cooking. If your curd does split and becomes visibly grainy or watery/chunky despite your best efforts, pass it through a fine-mesh sieve into a blender or food processor while still warm. Pulse for 30-60 seconds. This can sometimes re-emulsify the mixture and break down smaller egg particles, though it may not fully recover an intensely scrambled batch. The texture might be slightly thinner, but it often salvages the flavor.
When the curd reaches 77-82°C (170-180°F), it will be thick enough to coat the back of a spoon, and when you run your finger across the spoon, it will leave a clear path. This usually takes 8-12 minutes over a double boiler, or 5-8 minutes over direct low heat.
- Whisk in the Butter: Remove the bowl from the heat (or saucepan from direct heat). Add the cold, cubed butter, a few pieces at a time, whisking continuously until each addition is fully incorporated and melted before adding more. The cold butter helps to cool the curd slightly, stopping the cooking process, and adds richness and a beautiful sheen.
- Strain for Silkiness: Immediately pour the hot curd through a fine-mesh sieve into a clean bowl or container. This crucial step removes any tiny bits of cooked egg (even if you didn’t visibly curdle it, some might be there!), zest remnants, and ensures an impossibly smooth, silken texture. Don’t skip this! Use a rubber spatula to press the curd through the sieve.
- Chill and Set: Cover the surface of the curd directly with plastic wrap to prevent a skin from forming. Refrigerate for at least 4 hours, or preferably overnight, until thoroughly chilled and set. The curd will continue to thicken significantly as it cools.
Expert Customization: Fine-Tuning Flavor & Richness
Once you’ve mastered the basic technique, you can adjust your curd to suit specific applications.
- Adjusting Tartness:
- For a very tart curd (e.g., for balancing a sweet meringue pie, or a strong lemon tart): Reduce the sugar by 10-15g (about 1 tablespoon). This 10% reduction makes a noticeable difference. Ensure your lemons are genuinely tart (Eureka or Lisbon).
- For a sweeter, more mellow curd (e.g., for spreading on scones, or as a layer in a cake): Increase the sugar by 5-10g (1-2 teaspoons). You could also opt for Meyer lemons, which are naturally sweeter and less acidic, reducing the need for much sugar adjustment.
- Considering Lemon Varieties: Eureka and Lisbon lemons (common supermarket varieties) typically have a pH of 2.2-2.6, offering robust acidity. Meyer lemons have a higher pH (3.0-3.5) and a more floral, less aggressive tartness. Using 150ml of Meyer lemon juice might require reducing the sugar by only 5g, or even none, depending on desired sweetness.
- Adjusting Richness and Body:
- For an extra-rich, firm curd (ideal for tart fillings that need to hold shape): Add 1-2 additional egg yolks (making it 5-6 yolks and 1 whole egg total) and/or increase the butter by 15-20g. More yolks provide more emulsification and thickening power; more butter adds decadent mouthfeel.
- For a slightly lighter curd (perhaps for drizzling or a softer spread): Reduce the butter by 10-15g. Be aware that reducing butter significantly can impact the curd’s luxurious texture.
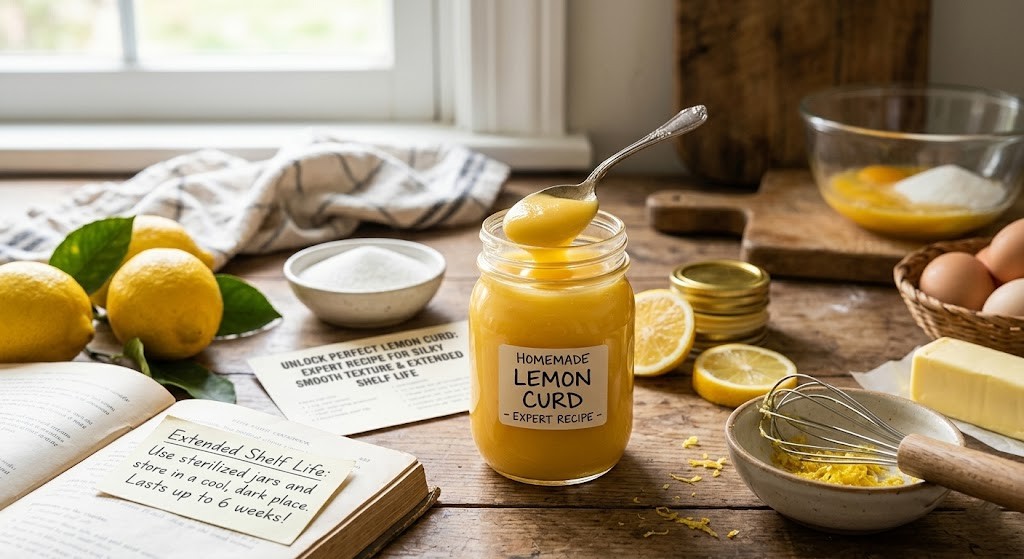
Optimal Storage and Identifying Spoilage
Homemade lemon curd, when properly stored, can be enjoyed for an extended period.
- Refrigeration: Once chilled and set, transfer the lemon curd to an airtight container. Press plastic wrap directly onto the surface of the curd before sealing the container. This prevents oxidation and the formation of a skin. Stored this way, homemade lemon curd typically lasts for 1-2 weeks in the refrigerator. The high acidity of the lemon juice, combined with the cooking process, acts as a natural preservative, inhibiting bacterial growth. Studies on similar acidic preserves indicate a reliable shelf life within this window.
- Freezing: For longer storage, lemon curd freezes beautifully. Pour the cooled curd into freezer-safe containers, leaving about 1 cm of headspace. Cover directly with plastic wrap, then seal tightly. It can be frozen for up to 3-4 months. Thaw overnight in the refrigerator before use. A slight separation may occur upon thawing, but a vigorous whisk will usually bring it back to a smooth consistency.
- Identifying Spoilage:
- Mold: Any visible fuzzy spots, dark specks, or discoloration on the surface or within the curd means it must be discarded immediately. Do not attempt to scoop it off.
- Off-Odor: While lemon curd has a bright, tangy aroma, an ‘off,’ sour, yeasty, or fermented smell indicates spoilage. Your nose is a powerful tool here. If it doesn’t smell distinctly like fresh lemon and butter, err on the side of caution.
- Unusual Liquid Separation: Some minor separation can occur, especially if frozen and thawed, but if the curd develops a significant layer of watery liquid that doesn’t re-emulsify with whisking, it’s a sign of protein breakdown and likely spoilage.
- Texture Changes (beyond normal thickening): If the curd becomes excessively thin and runny, or conversely, develops a gummy or excessively stiff, rubbery texture that it didn’t have when fresh, it’s a red flag.
Crucial Rule: When in doubt, throw it out. Trust your senses. Even if it ‘looks fine,’ an unusual smell or texture is a strong indicator it’s past its prime for safe consumption.
Specific Situations & FAQs
Below are common questions related to mastering lemon curd.
- What are the common causes of lemon curd curdling, and how can it be salvaged?
- How can I customize the tartness and richness of my lemon curd?
- How long does homemade lemon curd last, and what are the signs of spoilage?
I am a passionate recipe developer and food enthusiast specializing in heart-warming traditional dishes and simple, everyday meals. My goal is to inspire you to find joy and confidence in the kitchen through my easy-to-follow recipes.