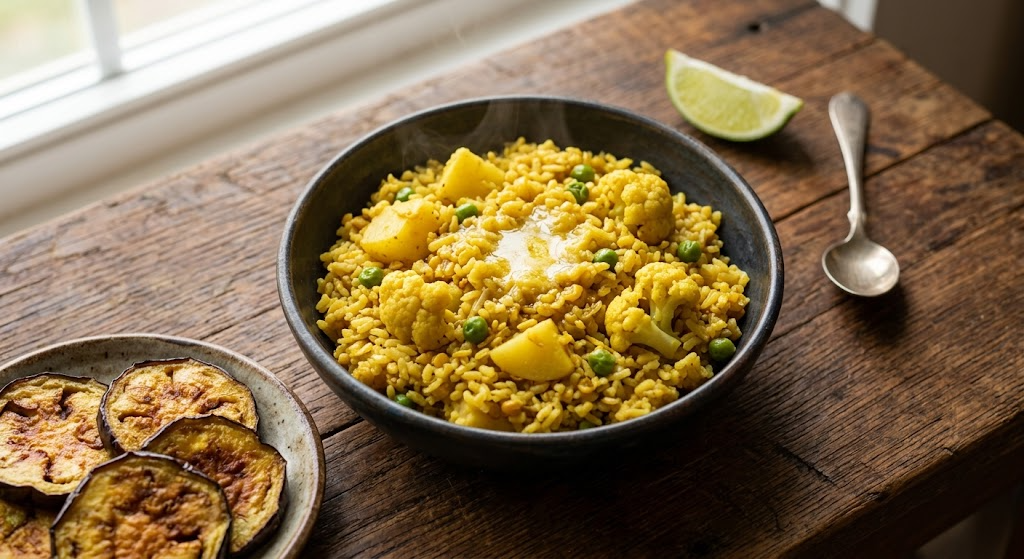
Prep time: 20 min | Cook time: 35 min | Serves: 4 | Best with: begun bhaja, omelette, or a piece of fried fish
Khichuri and khichdi are not the same dish, and the difference is one step: the dal is dry-roasted before it ever touches water. That single step is why a Bengali khichuri smells nutty and toasted while a north Indian khichdi tastes clean and soupy. Both are good. They are not interchangeable, and if you have only ever had the unroasted kind, the first spoonful of a proper bhuna khichuri is a genuine surprise.
This is the drier of the two Bengali versions — bhuna, meaning the grains stay distinct rather than collapsing into porridge. The looser, softer one is bhoger khichuri, the kind cooked in enormous pots for Durga Puja and served on a leaf plate. Same family, different consistency, and the only real difference is water.
It is also, unavoidably, a rainy-day dish. There is no practical reason khichuri should taste better when it is pouring outside. It simply does, and every Bengali household treats this as settled fact.
Why the Roasted Dal Matters
Moong dal is roasted dry in a pan until it turns one shade darker and starts to smell like toasted nuts. Two things happen: the flavour deepens, and the roasted grains hold their shape instead of dissolving. That is what gives bhuna khichuri its texture — you can see individual grains of dal in the finished pot.
Roasted dal also drinks water much faster than raw dal. Wash it quickly under cold water and drain it right away, or skip washing altogether if your dal is clean. Leave it soaking and you will have mush.
Ingredients
For the khichuri
- Gobindobhog rice – 1 cup (200 g), washed and drained. This short-grain aromatic rice is the traditional choice. Basmati is the wrong shape and the wrong perfume for this dish; if you cannot find gobindobhog, use any short-grain rice rather than a long-grain one.
- Moong dal (yellow split mung) – ¾ cup (150 g)
- Potato – 2 medium, peeled and quartered
- Cauliflower – 1 small head, cut into large florets (winter only — leave it out the rest of the year)
- Green peas – ½ cup, fresh or frozen
- Ginger paste – 1 tbsp
- Turmeric – 1 tsp
- Cumin powder – 1 tsp
- Sugar – 1 tsp (not optional, and not enough to taste sweet)
- Salt – to taste, roughly 1½ tsp
- Hot water – 3½ cups
- Mustard oil – 3 tbsp
- Ghee – 1 tbsp, for finishing
For the tempering
- Bay leaves – 2
- Dried red chillies – 2, whole
- Cumin seeds – 1 tsp
- Cinnamon – 1 inch stick
- Green cardamom – 3, lightly crushed
- Cloves – 3
- Garam masala – ½ tsp, for the end
Equipment
- A heavy-bottomed pot or kadai with a lid — thin pans scorch the bottom layer while the top is still raw
- A separate dry pan for roasting the dal
- A wooden spoon or flat spatula
Method
- Roast the dal. Put the moong dal in a dry pan over medium heat. Stir constantly. In about 4–5 minutes it will turn one shade darker and smell distinctly nutty. Take it off the heat at that point. Rinse quickly under cold water, drain, and set aside — do not let it sit in water.
- Fry the potatoes. Heat the mustard oil until it just begins to smoke, then lower the heat. Sprinkle a pinch of turmeric and salt over the potato pieces and fry them until the edges are golden. Remove and set aside. Do the same with the cauliflower if you are using it.
- Temper the oil. Into the same oil add the bay leaves, dried chillies, cumin seeds, cinnamon, cardamom and cloves. Wait for the cumin to sizzle and the spices to release their smell — about 30 seconds.
- Add the aromatics. Stir in the ginger paste, turmeric and cumin powder. Cook for a minute, splashing in a spoon of water if it starts sticking, until the raw smell of the ginger is gone.
- Add rice and dal. Tip in the drained rice and roasted dal. Stir gently for 2–3 minutes so every grain is coated in the spiced oil. This is the step people rush; it is what keeps the grains separate later.
- Add water. Pour in the hot water along with the salt and sugar. Use hot water, not cold — cold water drops the pot temperature and the grains break.
- Simmer. Bring to a boil, then lower to a gentle simmer and cover. Cook for about 15 minutes. Resist stirring; each stir breaks more grains.
- Add the vegetables. Return the fried potatoes and cauliflower, add the peas, and cook covered for another 8–10 minutes until the rice and dal are soft but still distinct.
- Finish. Turn off the heat. Spoon over the ghee, sprinkle the garam masala, cover, and leave it alone for five minutes before opening.
From My Kitchen
The dal roasting is where I went wrong for years, and in the direction you would expect: I assumed darker meant more flavour. It does not. Take it past that first nutty smell and a thin bitterness settles underneath everything, and no amount of ghee at the end covers it. The colour you want is barely a change — hold a spoonful next to the raw dal in the packet and you should just be able to tell them apart. Four or five minutes on medium heat, stirring the whole time, and off the heat while you are still slightly unsure whether it is done.
The other thing nobody tells you is how fast roasted dal absorbs water. I once roasted it beautifully, then let it sit in the rinsing water while I peeled potatoes, and by the time I came back it had gone soft and swollen. The khichuri that came out of that pot was fine, but it was porridge — every grain had given up. Now I rinse and drain in one motion, or skip the rinse entirely.
On the rice: I have made this with basmati more than once, when that was what the house had, and it works but it is a different dish. Basmati grains are long and stay proudly separate, so you lose the softness that makes khichuri comforting, and basmati’s perfume argues with the roasted dal instead of sitting under it. If gobindobhog is not available where you are, reach for a short-grain rice before you reach for basmati.
Adjusting to Taste
- For bhoger khichuri (the looser Puja-style one), use 5 cups of water instead of 3½ and stir more freely. You want it soft enough to spread slowly on the plate.
- Heat: the whole dried chillies flavour the oil without making it hot. For actual heat, slit two green chillies and drop them in with the water.
- The sugar is doing a job, not making it sweet. Leave it out and the dish tastes flat in a way that is hard to name.
- Vegetables are seasonal, not fixed. Cauliflower in winter, and outside winter I often use only potato and peas.
Storage
Khichuri thickens considerably in the fridge as the rice keeps absorbing. It keeps for 3 days in an airtight container. Reheat with a good splash of hot water, stirring gently to loosen it. It does not freeze well — the texture goes grainy on thawing.
FAQ
Can I make this in a pressure cooker?
Yes, and it is what many households do on a weeknight. Follow the recipe to the point where the water goes in, then use 3 cups instead of 3½ and cook for 2 whistles on medium. Add the fried vegetables after releasing the pressure, since they will disintegrate otherwise.
What is the difference between khichuri and khichdi?
Roasted dal. Bengali khichuri roasts the moong dal dry before cooking, which gives it a toasted, nutty flavour and a firmer grain. Most north Indian khichdi uses unroasted dal and comes out softer and milder. There are also spice differences — khichuri leans on whole garam masala and a little sugar — but the roasting is the fundamental one.
Is khichuri supposed to be dry or runny?
Both exist. Bhuna khichuri is drier with distinct grains; bhoger khichuri is loose and soft. This recipe makes the drier one. Neither is more correct than the other — they are served on different occasions.
Can I skip the mustard oil?
You can, but it is a real loss. Mustard oil has a sharp, slightly pungent quality that is part of how this dish is supposed to taste. If you have none, use a neutral oil rather than olive oil, which brings its own strong flavour.
Bhuna khichuri comes together fastest and most evenly in a good pressure cooker — we compared the top options in our guide to the best Indian pressure cookers, including the inner-lid vs outer-lid difference that actually matters for this dish.
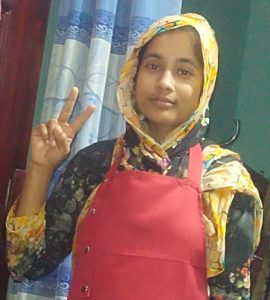
Rimi Sultana is a home cook from Bangladesh who has cooked for her family every day for the past five years and writes about it at Smart Cooks. Perpetually testing whether internet-famous recipes actually work in a regular home kitchen. Say hello on Facebook or through the contact page.